Oleanders are famously tough shrubs, but even these heat-loving plants can signal trouble with yellow leaves. A few older leaves turning yellow may be part of normal renewal. A whole branch, however, that fades from green to yellow and then brown deserves a closer look.
The good news is that yellow foliage does not always mean your oleander is doomed. Watering problems, compacted soil, low light, nutrient stress and sap-sucking pests can often be corrected. The important exception is oleander leaf scorch, a serious bacterial disease that can resemble drought stress.
Use the pattern of the yellowing, the condition of the soil and the location of the damage to narrow down the cause before you prune, fertilize or change your irrigation routine.
Start with the pattern: what do the yellow leaves look like?
Before reaching for a fertilizer or pesticide, inspect the entire shrub. Note whether the problem affects the oldest leaves, new growth, one branch or the whole canopy. Also check the undersides of leaves and the soil several inches below the surface.
- Older leaves yellow first: watering stress, root problems or a nutrient shortage are possible.
- New leaves are pale while veins remain green: a nutrient-availability problem may be involved, especially in alkaline or poor soil.
- One branch turns yellow, then develops brown tips and margins: investigate oleander leaf scorch promptly.
- Leaves are yellow and sticky, speckled or covered with tiny insects: sap-sucking pests may be feeding on the plant.
- Leaves yellow while the soil stays wet: roots may be short of oxygen because of poor drainage or excessive irrigation.
- Leaves yellow after a cold snap: frost or cold injury may be responsible, particularly in containers.
Cause 1: Too little water or irregular watering
Established oleanders tolerate dry conditions, but “drought tolerant” does not mean “never needs water.” Newly planted shrubs, container-grown plants and oleanders growing in reflected heat can dry out quickly. Underwatering commonly causes older leaves to yellow, curl, droop or drop.
Hot, windy weather can make the top inch of soil look dry while the deeper root zone remains moist. Conversely, a light daily sprinkle may wet only the surface and leave the main roots thirsty.
How to check moisture accurately
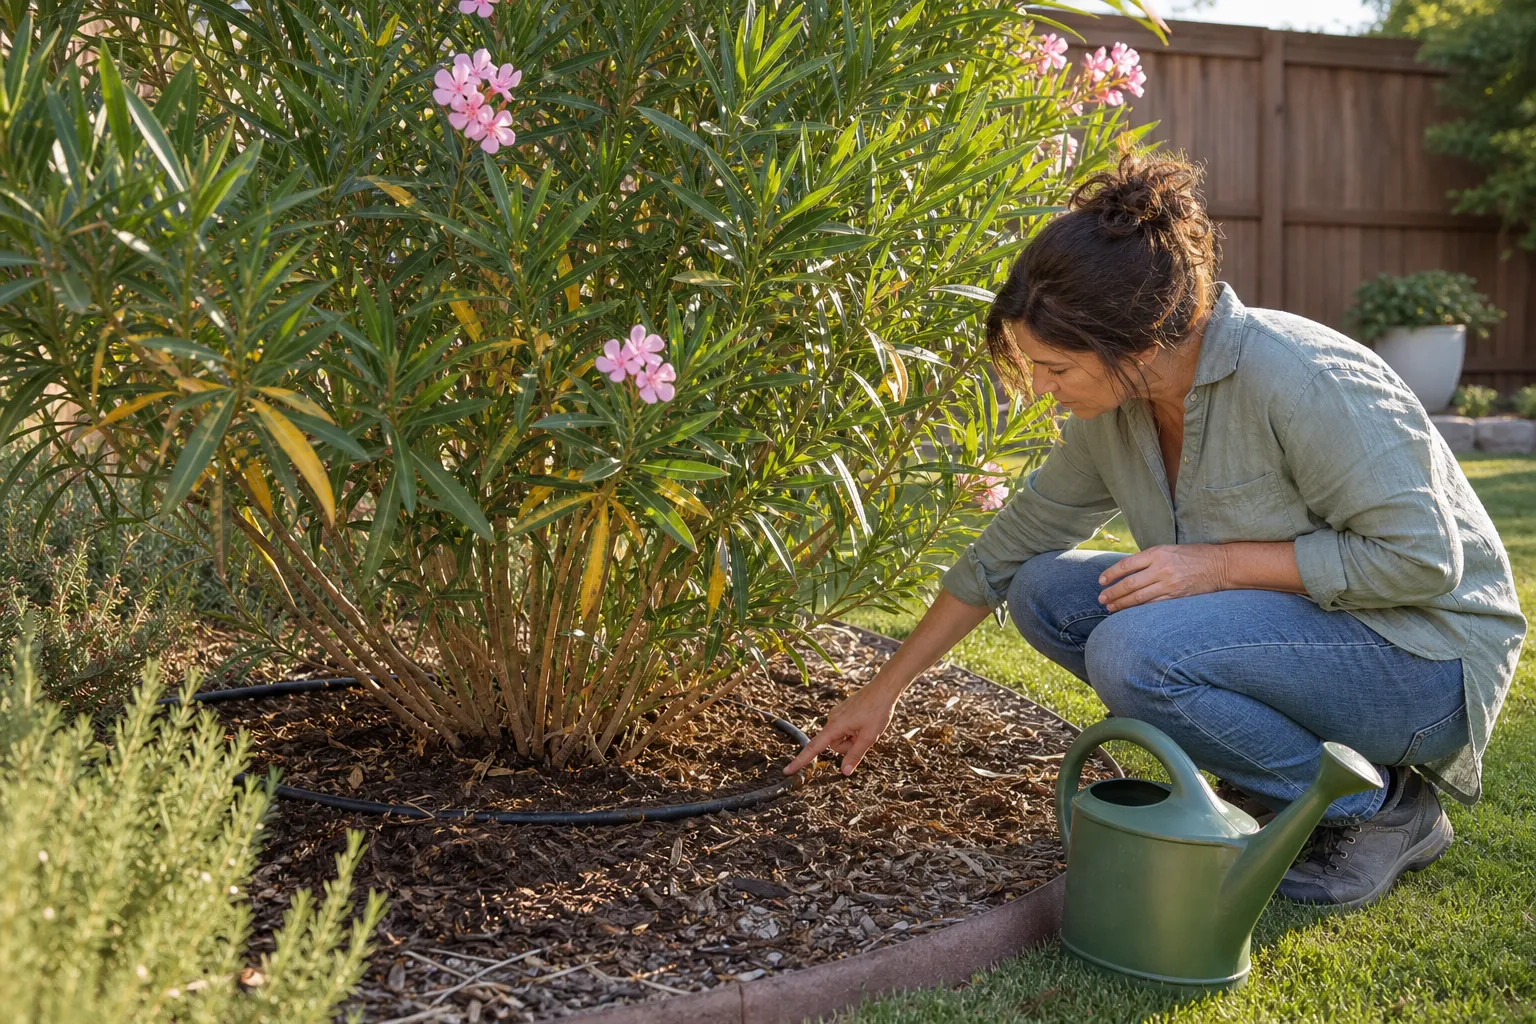
Push a screwdriver or your finger 4 to 6 inches into the soil near the outer edge of the canopy, not directly against the trunk. For a container oleander, check several inches below the surface and lift the pot if possible: a very light container often needs water, while a heavy one may still be saturated.
As a practical home test, measure how much water your hose or watering can delivers. Place a 1-gallon bucket under the hose and time how long it takes to fill. If it takes 30 seconds, a 5-minute watering session delivers about 10 gallons. This simple measurement is more useful than guessing by minutes alone.
There is no universal gallon amount for every oleander. A mature shrub in a deep, well-drained bed may need a thorough soaking less often than a small plant in a 15-gallon container. Aim to moisten the root zone deeply, then allow the surface to dry somewhat before watering again.
A better watering routine
- Water slowly at the drip line, where the canopy would shed rain, rather than only beside the trunk.
- Apply water until the soil is moist several inches down, but stop if it begins pooling for long periods.
- During a hot spell, check containers daily and landscape plants every few days.
- Water in the morning when practical so foliage and soil surfaces have time to dry.
- Use a 2- to 3-inch layer of mulch to reduce evaporation, keeping mulch a few inches away from stems.
Cause 2: Too much water or poor drainage
Overwatering can produce symptoms that look surprisingly similar to drought. When soil remains saturated, roots struggle to obtain oxygen and may stop functioning properly. The plant can then wilt or yellow even though water surrounds it.
Check for slow drainage after irrigation or rain. If water remains ponded around the shrub, the soil may contain too much clay, the planting area may be low, or a container may have blocked drainage holes. A saucer that holds standing water can also keep container roots too wet.
Correct the underlying condition rather than simply watering less. Make sure containers drain freely, empty decorative saucers and avoid planting oleander in a spot that stays soggy. Do not add fertilizer to a severely stressed plant until the roots begin functioning normally.
Cause 3: Root damage, compacted soil or transplant stress
Oleander roots can struggle after transplanting, construction near the plant, trenching or repeated foot traffic over the root zone. Compacted soil contains fewer air spaces, making it harder for roots to absorb water and nutrients.
Newly planted shrubs may also yellow temporarily while their roots establish. Keep the root zone evenly moist—not constantly wet—and avoid aggressive digging around the plant. A wide mulch ring can protect roots from heat and compaction.
If an oleander is declining despite sensible watering, inspect the planting site. Look for circling roots in a container, a buried root crown or heavy soil that stays wet long after irrigation. Correcting a serious drainage or root problem may require moving a young plant rather than repeatedly treating the leaves.
Cause 4: Nutrient deficiency or excess salts
Pale foliage can result from low nutrient availability, but yellow leaves alone do not prove that fertilizer is needed. Nitrogen deficiency often produces generally light-green or yellow older leaves and weak growth. Iron-related chlorosis more often affects newer leaves, with the veins staying greener than the tissue between them.
Soil pH, poor roots and excess salts can prevent an oleander from using nutrients that are already present. In areas with mineral-rich irrigation water, salts may accumulate in the soil and cause yellowing, brown margins or leaf-tip burn, especially on older foliage.
Use a test before adding products
A soil test is the most reliable way to separate a genuine deficiency from a drainage, pH or salt problem. Your state university extension service can usually point you toward an appropriate soil-testing laboratory.
If the soil test supports fertilizing, choose a balanced fertilizer labeled for landscape shrubs and follow the package rate. Apply it to moist soil, keep granules away from stems and do not exceed the label directions. More fertilizer is not a faster cure; excess nutrients can damage roots and worsen leaf-edge burn.
Container plants may benefit from occasional deep watering that allows some water to drain through the pot, helping reduce accumulated soluble salts. Do this only when the container drains freely, and follow local water-use guidance.
Cause 5: Oleander leaf scorch
Oleander leaf scorch is one of the most important causes to recognize, particularly in affected parts of the southern United States and California. It is associated with a strain of the bacterium Xylella fastidiosa, which interferes with water movement inside the plant.
The early symptoms can look like drought: leaves on one branch or section begin to yellow and droop. The leaf tips and margins then turn tan or brown, and affected twigs gradually die back. Unlike ordinary drought stress, the plant continues declining even after the soil receives adequate water.
How scorch differs from drought
- Drought: many branches may yellow or droop during the same period, and the plant may recover after thorough watering.
- Leaf scorch: symptoms often begin in one branch or section, progress inward from leaf tips and margins, and continue despite proper soil moisture.
- Salt injury: leaf margins may brown without pronounced drooping, and older leaves may show the strongest damage.
Do not assume every yellow oleander has scorch. Drought, salt stress and root problems are common look-alikes. If symptoms progress from one branch through more of the canopy, contact your county extension office, a certified arborist or a plant diagnostic laboratory for help with identification.
There is no dependable cure that restores an oleander once this disease is established throughout the plant. On a newly affected shrub, a professional may recommend removing symptomatic limbs well below visible symptoms and disinfecting pruning tools between cuts. If the entire plant is affected, removal may be the most practical option. Avoid moving cuttings from a suspicious plant to another location.
Cause 6: Scale, aphids, mealybugs and other sap-feeding pests
Oleanders can host armored scale, aphids, mealybugs and other sap-feeding insects. Heavy infestations may cause yellowing, distorted growth, leaf drop or a general lack of vigor.
Inspect both sides of the leaves, leaf joints and young stems. Scale may look like fixed white, tan or brown bumps rather than moving insects. Mealybugs appear cottony, while aphids tend to cluster on tender growth. Sticky honeydew or black sooty growth can point to sap-feeding activity.
Start with low-impact control
- Prune out a badly infested shoot if doing so will not disfigure the plant.
- Rinse foliage and stems with a firm stream of water when the plant can dry quickly.
- Encourage beneficial insects by avoiding unnecessary broad-spectrum insecticides.
- For persistent infestations, identify the pest before selecting a product.
- Read and follow the current product label, including plant-use restrictions, protective equipment and reapplication limits.
Because oleander leaves are narrow and pests often hide on the undersides, one quick spray may miss the problem. Reinspect after several days and treat only when the pest population is clearly causing damage.
Does the oleander variety matter?
Yes, but not in a way that makes one cultivar immune to every problem. Dwarf and compact cultivars are often easier to monitor and may dry out faster in containers because their pots are small. Tall, vigorous plants can mask early symptoms until a larger branch is involved.
Some oleander cultivars may show different levels of tolerance or symptom severity when exposed to leaf scorch, but cultivar performance varies by region and disease pressure. Treat claims of a completely disease-proof oleander with caution. Choose plants from reputable local nurseries, inspect them before purchase and match the cultivar to your available space, sun and winter conditions.
In USDA Zones 8 through 11, oleander is commonly grown outdoors, although winter exposure, local microclimates and occasional freezes still matter. In colder areas, container plants may need a bright, protected winter location. Yellowing after a cold night may be injury rather than a feeding problem.
A simple seven-day troubleshooting plan
- Day 1: Photograph the plant and mark which branches show symptoms.
- Day 1: Check soil moisture 4 to 6 inches deep and inspect container drainage.
- Day 2: Examine leaf undersides, stems and new growth for scale, aphids or mealybugs.
- Day 2: Look for brown tips, marginal scorch, sticky residue or black surface growth.
- Days 3–6: Correct watering only if the soil test shows the plant is too dry or too wet; do not change several variables at once.
- Day 7: Compare new photographs. Continued branch-by-branch decline despite adequate moisture warrants professional diagnosis.
Keep notes on rainfall, irrigation volume and weather. Measuring water in gallons and recording the interval between soakings can reveal a pattern that is easy to miss when relying on memory.
When to prune, replace or seek help
Remove dead or clearly damaged twigs with clean, sharp pruners, but avoid heavy pruning while you are still diagnosing the problem. If yellowing is limited to a few old leaves and the plant is producing healthy new growth, wait and observe.
Seek expert help when symptoms spread along individual branches, the tips and margins turn brown, the plant fails to respond to corrected watering, or several oleanders in the same area develop similar decline. A diagnosis is especially worthwhile before replacing a mature shrub or treating a large landscape planting.
Handle oleander carefully around children and pets, and do not burn prunings or use them as mulch. Wear gloves when pruning and dispose of plant material according to local guidance.
Healthy leaves start with steady care
Yellow oleander leaves are a clue, not a diagnosis. Check the moisture below the surface, confirm that excess water can drain, inspect for pests and look closely at whether the problem is widespread or confined to one branch.
With measured watering, sensible fertilizing and regular inspections, many stressed oleanders regain good color and vigor. If the pattern points to leaf scorch, act promptly and obtain a professional diagnosis rather than repeatedly adding water or fertilizer. A careful first inspection gives you the best chance of saving the plant—and preventing the same problem from returning.