Autumn is one of the most forgiving seasons for repairing a thin lawn or starting cool-season grass from seed. The soil often stays warm enough for germination while cooler air reduces heat stress, and young seedlings can establish before next summer’s toughest conditions arrive. Yet good timing alone cannot rescue a poor seeding job.
The most common failures are surprisingly simple: choosing the wrong grass, scattering seed onto hard ground, sowing too late, watering by guesswork, or treating new seedlings like mature turf. Avoid those mistakes and your lawn has a much better chance of entering winter dense, rooted, and ready for spring growth.
These guidelines are aimed primarily at cool-season lawns such as tall fescue, Kentucky bluegrass, perennial ryegrass, and fine fescues. Warm-season grasses – including bermudagrass, zoysiagrass, centipedegrass, and St. Augustinegrass – usually follow a different schedule and are generally established during late spring or summer.
1. Seeding at the Wrong Time
“Fall” is not one fixed date across the United States. In northern states, the useful seeding window may close by late August or September. In much of the Mid-Atlantic and transition zone, late summer through early fall is often suitable. Farther south, warm soil and lingering heat can shift the best window later.
The goal is to give seedlings enough time to germinate, develop several leaves, and build roots before hard freezes or winter dormancy. If you wait until after the first frost, establishment may be poor, especially where winter arrives quickly. On the other hand, sowing during a late-summer heat wave can force you into intensive watering and expose seedlings to stress before they are established.
How to avoid it
- Check your state university extension’s recommended seeding window rather than relying on a national calendar.
- Use local weather forecasts to avoid periods of extreme heat, drought, or heavy rain.
- Plan backward from your area’s usual first hard freeze, allowing several weeks for establishment.
- For larger projects, seed in late summer or early fall instead of waiting for leaf drop.
Soil temperature provides a useful clue. Cool-season grasses generally establish well when soil is warm enough for germination but daytime conditions are no longer scorching. A simple soil thermometer can be more helpful than the calendar alone.
2. Choosing Seed That Does Not Suit Your Lawn
A bag labeled “sun and shade” may sound convenient, but no seed mix can make an unsuitable site behave like an ideal one. Before buying seed, look at how much direct sunlight the area receives, whether the soil drains well, how much foot traffic it gets, and which grass already grows successfully nearby.
Turf-type tall fescue is often a practical choice for sunny lawns in many regions because its deeper roots can help it handle periodic dryness. Fine fescues can perform better in lower-maintenance or partly shaded settings, while Kentucky bluegrass spreads gradually and may need more patience. Perennial ryegrass germinates quickly, but it may be less persistent in regions where summers are hot or stressful.
These are broad tendencies, not guarantees. Local climate, soil, irrigation, and cultivar selection matter. A seed blend containing several compatible varieties can sometimes provide more resilience than a single variety, but avoid buying a mixture simply because it is inexpensive.
Compare the label, not just the picture
- Identify the grass species and named varieties, if listed.
- Check the percentage of pure live seed and the germination information.
- Look for low percentages of weed seed and inert material.
- Match the blend to your sun exposure and regional climate.
- Buy enough seed to apply the recommended rate; underseeding often produces a thin stand that weeds can occupy.
If you are unsure, compare university turfgrass trials or regional recommendations before purchasing. A small investment in better-adapted seed can save you from repeating the job next year.
3. Spreading Seed Without Preparing the Soil
Grass seed needs reliable contact with moist soil. Simply broadcasting it over a compacted, thatchy, or leaf-covered lawn leaves many seeds perched where they can dry out, wash away, or become food for birds. This is one of the main reasons an overseeding project appears to “do nothing.”
Start by mowing slightly shorter than usual, while staying within the safe mowing range for your existing grass. Remove heavy leaf layers and loosen compacted areas. If foot traffic has created hard soil, core aeration can open small channels and expose more soil. A slit seeder or vertical mower can help on larger areas.
Do not automatically dethatch or aggressively rake every lawn. Excessive removal can injure healthy turf, and many lawns do not have a serious thatch problem. Focus on creating enough open soil for seed to settle.
A simple preparation sequence
- Mow and collect heavy clippings or leaves.
- Repair drainage problems and smooth major depressions.
- Core-aerate compacted soil when it is moderately moist – not dusty and not soggy.
- Rake lightly to expose soil in bare or thin areas.
- Spread seed in two directions for more even coverage.
- Press the seed gently into the surface with a roller or the back of a rake.
For a new lawn or a major renovation, consider a soil test before you begin. It can reveal pH and nutrient issues that are difficult to correct after seedlings are already growing. Add lime or fertilizer only when the test or product directions support the application.
4. Watering Too Much, Too Little, or Too Infrequently
Newly seeded areas need consistent moisture near the soil surface. That does not mean keeping the ground saturated. Overwatering can wash seed into piles, create muddy conditions, and reduce oxygen around developing roots. Underwatering allows the seedbed to dry, which can interrupt germination and kill tiny seedlings.
During the germination period, check the soil by hand at least once a day. The surface should feel evenly moist, but water should not pool or run down the slope. Light, frequent irrigation is often necessary at first, especially in sunny or windy locations. As seedlings emerge and grow, gradually water less often but more deeply.
Measure your sprinkler instead of guessing
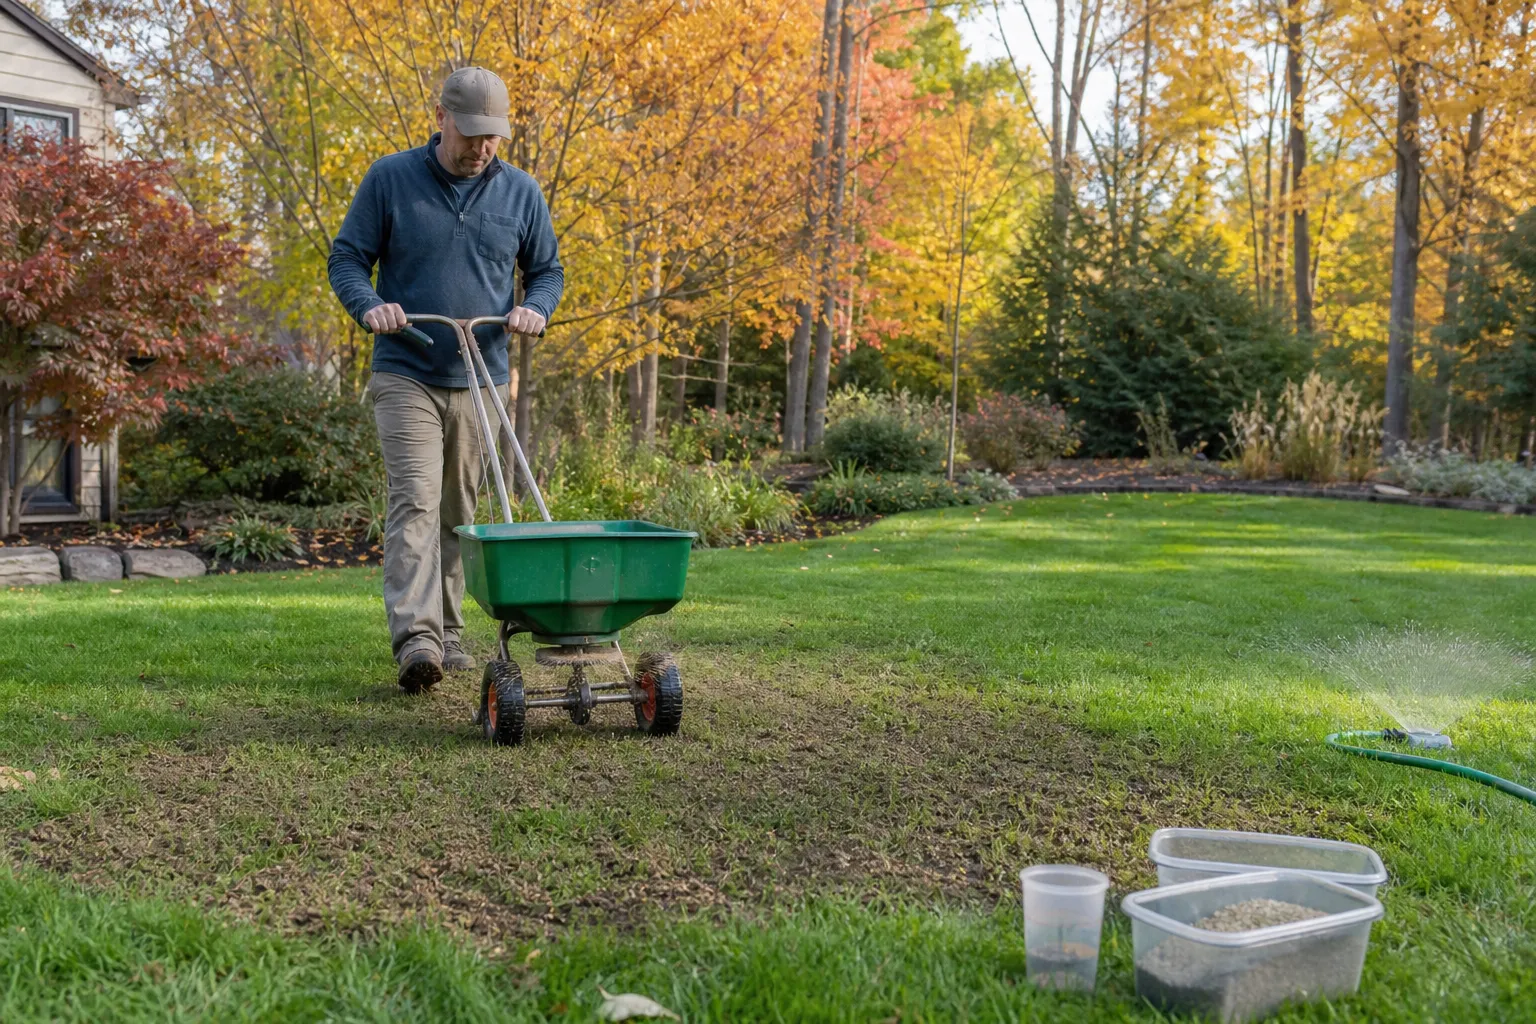
Place several shallow, straight-sided containers – such as tuna cans or small food-storage cups – around the seeded area. Run the sprinkler for 15 minutes and measure the collected water with a ruler. If one area receives much more than another, adjust the sprinkler or move it in sections.
For example, if your sprinkler delivers about 1/4 inch in 15 minutes, two 15-minute cycles would apply roughly 1/2 inch, provided the water is distributed evenly. The exact schedule depends on soil type, weather, slope, sun, and rainfall, so use the measurement as a starting point rather than a universal prescription.
- Water gently enough that seed stays in place.
- Inspect slopes and edges for runoff.
- Shorten or pause irrigation after rainfall.
- As roots develop, lengthen the time between waterings gradually.
- Continue monitoring during dry autumn weather before the ground freezes.
A newly seeded lawn is not automatically drought-proof because it was planted in fall. If autumn turns unusually dry, young grass still needs attention.
5. Applying the Wrong Fertilizer or Weed Control
Fertilizer can support establishment, but more is not better. Excess nitrogen may push soft, leafy growth while roots remain underdeveloped, and a heavy application can damage seedlings or run off during rain. Use a starter fertilizer only if it suits your soil test, lawn plan, and local regulations, and always follow the product label.
Be especially cautious with “weed-and-feed” products and preemergent herbicides. Products designed to stop weed seeds from germinating can also interfere with desirable grass seed. Many postemergence herbicides also require newly seeded grass to be established and mowed several times before treatment. Read the label carefully for seeding restrictions, waiting periods, and permitted sites.
When weeds appear among new seedlings, resist the urge to spray immediately. A few weeds are often less damaging than an inappropriate herbicide application. Improve mowing, watering, and seed-to-soil contact first; a dense stand of grass will naturally reduce opportunities for weeds.
Use a light, deliberate feeding plan
- Apply only the amount recommended on the fertilizer label.
- Use a calibrated spreader to prevent stripes and overlaps.
- Do not apply fertilizer to frozen, saturated, or drought-stressed soil.
- Keep fertilizer off sidewalks and driveways, then sweep stray granules back onto the lawn.
- Delay weed control until the new grass meets the product’s establishment requirements.
After Seeding: The First Mow Matters
Once seedlings are tall enough to mow, use a sharp blade and remove no more than one-third of the grass height at a time. Avoid mowing wet soil, turning sharply, or using heavy equipment that could pull out young plants. If the new grass is uneven, raise the mower slightly for the first cut.
Keep foot traffic light while the seedlings develop. Children, pets, and repeated shortcuts across the lawn can compact the soil and damage fragile plants. Continue removing heavy leaves so they do not smother the new grass, but rake gently rather than dragging aggressively across the surface.
A More Reliable Autumn Seeding Checklist
- Identify whether your lawn contains cool-season or warm-season grass.
- Choose seed suited to your region, sunlight, soil, and traffic.
- Test the soil when a major renovation or recurring failure suggests a nutrient or pH problem.
- Prepare the surface so seed can touch soil.
- Sow at the regional optimum time, not simply on the first cool day.
- Divide seed into two portions and spread in crossing directions.
- Press seed gently into the soil.
- Keep the seedbed evenly moist without creating runoff or standing water.
- Use fertilizer and weed-control products only according to their labels.
- Protect the new grass until it is established and has been mowed several times.
Give Your Lawn a Strong Start
Successful autumn seeding is less about a secret product and more about matching the job to the site. Choose the right grass, create seed-to-soil contact, water with measurement and patience, and respect the limits of the season.
If the first attempt is uneven, do not assume the entire project failed. Look for clues: dry patches suggest irrigation problems, bare strips may indicate poor spreader coverage, and seedlings clustered in aeration holes point to insufficient soil contact. Correct the cause, reseed the weak areas when conditions remain suitable, and keep going. With a thoughtful start, even a tired lawn can head into winter looking fuller and come back stronger in spring.