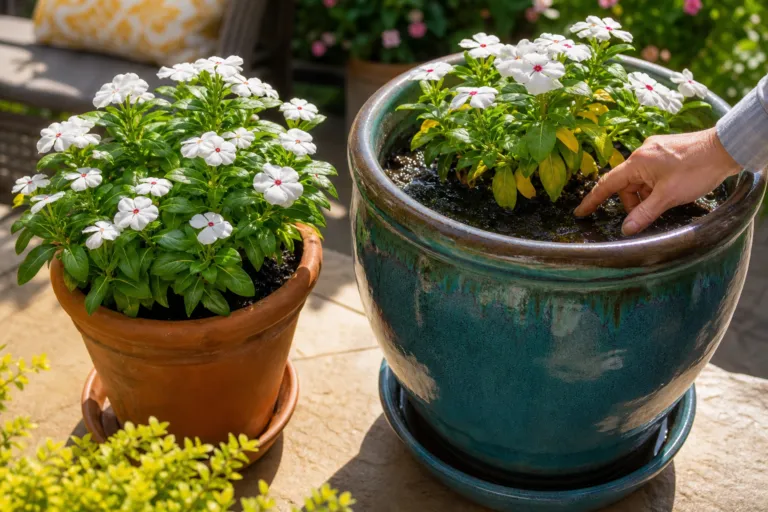
A new plant can look perfectly healthy when you bring it home – and still fail within weeks. The reason is often hidden below the surface, in the narrow zone where roots meet soil, water and air. A difference of only a few centimeters can decide whether those roots expand into the garden or remain trapped, dry out or suffocate.
That small margin matters for everything from a tomato seedling to a container-grown shrub. Plant too high and roots can dry out. Plant too low and the stem or root crown may stay wet, oxygen becomes scarce, and the plant may struggle to establish. The good news is that you do not need special equipment to get this right. You mainly need to slow down, inspect the plant and pay attention to the soil line.
The soil line is not a suggestion
When you remove a plant from its nursery pot, look for the original growing level. You may see a subtle change in color or texture on the stem, a widening at the base, or the first roots emerging from the root ball. That point should usually finish at the same level as the surrounding garden soil.
For trees, the most useful landmark is the root flare: the gentle widening where the trunk transitions into the major roots. It should remain visible at the soil surface, or sit just slightly above it. If you cannot find a flare on a young shrub, use the top of the root mass and the plant’s original soil level as your guide.
Do not assume the top of a container is the correct depth. Plants are sometimes shifted, settled or covered with extra potting mix during production. If several inches of mix lie above the first structural roots, remove enough to find the true root collar before you dig the hole.
Why planting too deep causes trouble
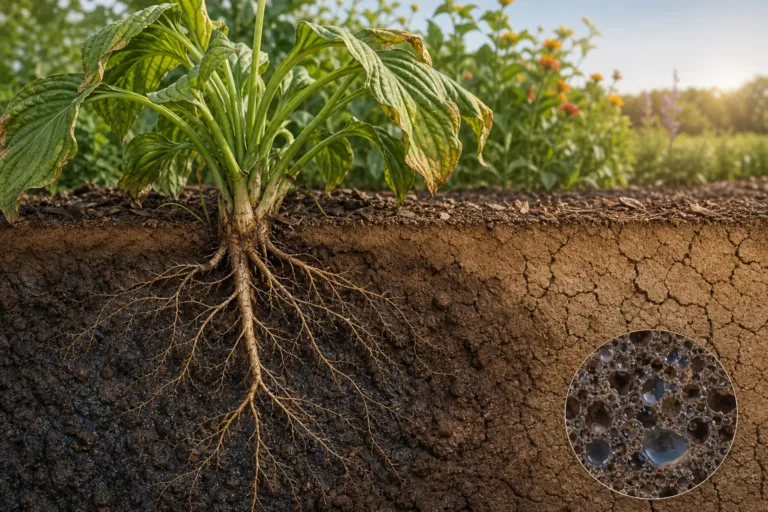
Roots need water, but they also need oxygen. A hole that is too deep can leave the root system in a poorly aerated layer, especially when the soil remains saturated after rain or irrigation. The plant may look watered, yet the roots cannot function well.
Buried stems create a second problem. Bark is designed to remain above ground, where it can dry between wet periods. When soil or mulch stays against the trunk, the base remains damp and may become vulnerable to decay or other damage. In trees, a buried root flare can also encourage roots to grow in undesirable directions around the trunk.
Planting too high is not harmless either. Roots exposed above the soil line can dry quickly, and the root ball may not make reliable contact with the surrounding soil. A plant that rocks in the hole also has a harder time producing fine new roots.
Dig wide, not deep
For most container-grown plants, make the hole no deeper than the root ball and at least twice as wide. A wide, shallow hole gives new roots a loosened zone to explore without placing the plant below grade.
Set the plant on firm, undisturbed soil at the bottom of the hole. Avoid digging deeper and then adding loose soil underneath to raise the plant; that fill can settle later and leave the root ball too low.
A reliable planting sequence
- Water the plant first. A moist root ball is easier to handle and less likely to crumble.
- Find the original soil level. Inspect the trunk, stem and upper roots before digging.
- Measure the root ball. Use its actual depth, not the height of the nursery container.
- Dig a hole at least twice as wide. Make the sides rough rather than smooth and glazed.
- Set the plant high enough. The root flare or original soil line should match the finished grade.
- Check from several angles. Make sure the plant is upright and not leaning into the hole.
- Backfill with the soil you removed. Break up large clods, but do not pack the soil tightly.
- Water slowly. Let the soil settle naturally, then add more soil if the plant sinks.
In ordinary garden soil, replacing the excavated soil is often better than creating a small pocket of rich material around the roots. A dramatically different backfill can hold water differently from the native soil, and roots may circle within the improved pocket instead of moving outward. If your soil is extremely sandy, compacted or heavy clay, improve the broader planting area rather than treating only the hole as a tiny container.
Those first few inches are a root-building zone
Newly planted roots usually begin by exploring the soil immediately around the original root ball. That upper zone must balance three things: moisture, air and physical space. Compacted soil has fewer useful pores, while very loose or dry soil may not hold enough water against the root surface.
Soil texture affects the balance. Sandy soil drains quickly and often needs more frequent checking. Clay can hold substantial water but may drain slowly and become difficult for roots to penetrate when compacted. Loam and well-structured garden soil often provide a more forgiving middle ground, but even good soil can become waterlogged in a low spot.
Organic matter can improve soil structure and water storage, but more is not always better. Instead of filling a planting hole with a very different mixture, spread compost or other suitable organic material across the planting bed and mix it into the upper soil according to local extension guidance. The goal is a gradual transition between the root ball and the surrounding ground.
Water the root ball – not the calendar
New plants need consistent moisture while they produce roots beyond the original root ball. That does not mean keeping the entire bed constantly wet. It means checking the root zone and adjusting for temperature, wind, rainfall, soil type and plant size.
A simple measurement can make your watering more accurate. Place a straight-sided container under a hose or watering wand and time how long it takes to collect 1 gallon. If it takes 4 minutes, a 2-minute watering session delivers about 0.5 gallon from that setting. Repeat the test at the actual flow rate you use in the garden; a different nozzle setting can change the result considerably.
A practical first-week example
Suppose a 1-gallon perennial is planted in a bed with moderately draining loam. On planting day, you might apply roughly 1 gallon slowly around the root ball, allowing it to soak in rather than run across the surface. During a hot, windy week, check the soil every day or two by feeling several inches down near the root ball – not just touching the surface.
For a larger container shrub, the required volume may be several gallons. One useful approach is to water slowly until the root ball is thoroughly moistened, then check how quickly the soil dries. A small plant in sandy soil may need attention more often than the same plant in a heavier soil. These are starting points, not universal prescriptions.
- Water slowly enough that the soil absorbs it.
- Check moisture below the surface before watering again.
- Pay special attention during heat, wind and extended dry weather.
- Reduce watering when rainfall has thoroughly moistened the root zone.
- Do not let a saucer-like planting hole collect water around the stem.
Seedlings and small transplants often need more frequent, shallower checks because their roots occupy a small volume. As the root system expands, aim to moisten a larger area rather than repeatedly wetting only the stem’s immediate base.
Try a two-week planting experiment
If you enjoy learning by observation, compare two similar plants rather than relying on memory. Choose the same species and similar container sizes – two basil plants, two peppers or two ornamental grasses work well. Plant one at the correct original soil level and deliberately plant the other about 2 inches too deep. Keep sunlight, spacing and watering as similar as possible.
Mark each plant and record observations on planting day, day 4, day 8 and day 14. Note leaf firmness, new growth, soil moisture 2 to 3 inches below the surface, and whether the plant rocks when gently touched. Do not leave a badly planted tree or shrub in place for the sake of the experiment; correct the mistake promptly if the plant shows serious stress.
You can also compare two varieties of the same crop. For example, one compact tomato and one vigorous indeterminate tomato may dry at different rates because their foliage and root systems develop differently. The comparison will not prove that one variety always needs a particular amount of water, but it will teach you how plant size, soil and weather interact in your own garden.
Mulch helps – but only when it stays off the plant
A layer of organic mulch can slow evaporation and reduce competition from turf and weeds. Spread it broadly over the root zone, but keep it away from trunks, stems and the root flare. A mulch mound touching the plant defeats the purpose of checking the soil line and keeps the base unnecessarily wet.
For newly planted trees and shrubs, a few inches of mulch is generally enough. Avoid burying the root ball, raising the finished soil level or creating a deep, wet collar around the trunk. The mulch should look like a shallow donut, not a volcano.
Five small checks before you walk away
- Can you see the tree’s root flare or identify the plant’s original soil line?
- Is the planting hole wide enough for roots to grow outward?
- Is the bottom of the root ball resting on firm soil?
- Does water soak in rather than pool around the stem?
- Is mulch several inches away from the trunk or crown?
These checks take only a few minutes, but they address the conditions that matter most during establishment. A plant does not need a perfect garden bed to survive its first season. It needs the right depth, dependable soil contact, enough moisture and room for roots to move.
Give the roots a fair start
The difference between a thriving new plant and a struggling one may be hidden in a layer only a few centimeters thick. Set the root system at the right height, prepare a wide hole, water according to actual conditions and keep soil and mulch off the stem. Then watch what happens instead of watering automatically.
Even if your first planting does not go perfectly, you can usually improve it. Lift a sunken plant while the soil is workable, expose a buried root flare carefully, or adjust your watering after checking below the surface. Once you begin treating the soil line as a critical planting landmark – not an afterthought – you give almost every new plant a much better chance to settle in and grow.