Fall is one of the most forgiving times to start or repair a lawn in much of the United States. Warm soil helps seed germinate, cooler air reduces stress on young grass, and many annual weeds are slowing down for the season. With careful preparation and steady moisture, a thin or tired lawn can develop strong roots before summer arrives.
The key is not simply scattering seed before the first frost. A dense lawn depends on choosing grass that suits your region and yard, creating good seed-to-soil contact, and adjusting watering as the seedlings grow. Follow these steps and you will give your new grass a much better start.
First, decide whether fall is the right season
Autumn seeding works best for cool-season grasses, including Kentucky bluegrass, perennial ryegrass, fine fescues, and tall fescue. These grasses grow most actively during the cooler parts of the year. In much of the Northeast, Midwest, Pacific Northwest, and higher-elevation areas, late summer through early fall is the main seeding window.
Timing varies widely across the country. In northern areas, you may need to seed from mid-August into early September. In central regions, late August through September often works well. Farther south, cool-season grasses may be seeded later, while warm-season lawns such as bermudagrass, zoysia, centipedegrass, and St. Augustinegrass usually follow a spring or early-summer schedule instead.
Use your local extension service or a trusted regional lawn calendar to refine the date. The important goal is to seed early enough for the grass to develop several leaves and a useful root system before consistently cold weather arrives. If the soil has already become cold and seedlings have little time to establish, spring may be safer than forcing a very late fall seeding.
Choose seed for the site, not just the label
Grass seed is sold as a species, blend, or mixture. A blend combines several varieties of one grass species, while a mixture combines different species. Mixtures can provide insurance: one grass may perform better in sun, another in light shade, and another under foot traffic.
How common cool-season grasses compare
- Kentucky bluegrass: Forms an attractive, dense lawn and can recover from wear, but it germinates more slowly than perennial ryegrass and usually needs good sunlight and consistent moisture.
- Perennial ryegrass: Germinates quickly and establishes a green cover fast. It is useful in mixtures and for renovation, although it may not be the best choice as the only grass in every climate or yard.
- Tall fescue: Develops a deeper root system than many traditional lawn grasses and is often selected for sunny, higher-traffic, or periodically dry sites. It needs enough time to establish before severe winter in colder areas.
- Fine fescue: Includes creeping red fescue, chewings fescue, hard fescue, and sheep fescue. These grasses can perform well in lower-maintenance areas and some light shade, but deep shade is a challenge for any turfgrass.
Before buying seed, study the light, drainage, traffic, and watering pattern of your yard. A sunny play area calls for a different mixture than a lightly shaded side lawn. Check the seed label for the percentage of pure seed, other crop seed, inert material, and weed seed. A bargain bag is not necessarily a bargain if much of its weight will never become lawn.
The USDA Plant Hardiness Zone Map can help you understand winter conditions, but it should not be your only guide. Turf selection also depends on summer heat, rainfall, soil type, shade, and maintenance. Local university extension recommendations are especially useful when you are choosing between tall fescue, bluegrass, ryegrass, and fine fescues.
Step 1: Test and inspect the soil
A soil test is one of the most useful preparations you can make. It can reveal soil pH and nutrient levels, helping you avoid adding lime, phosphorus, or other amendments unnecessarily. Follow the test recommendations rather than guessing from the appearance of the lawn.
Look for practical problems at the same time:
- Compacted soil that feels hard and resists a shovel
- Standing water after rain
- Very thin topsoil over gravel, construction debris, or roots
- Areas shaded by buildings or dense trees
- Slopes where seed may wash away
Correct drainage and grading problems before seeding. Grass seed cannot compensate for a site that stays saturated or sheds every drop of rain. If the soil is compacted, core aeration can create channels for air, water, and roots. Work the soil only when it is slightly moist; tilling or heavily raking wet soil can create additional compaction.
Step 2: Prepare a firm, fine seedbed
For a completely bare area, remove rocks, sticks, old construction material, and thick vegetation. Loosen the upper few inches of soil, then smooth the surface with a rake. If you add topsoil or compost, blend it thoroughly into the existing soil instead of creating a thin layer that behaves differently from the soil below.
The finished seedbed should be firm enough to support your foot without sinking deeply, but loose enough at the surface for roots to penetrate. A useful test is to walk across it: your footprints should be shallow and clearly visible, not deep impressions in soft mud.
For overseeding, mow the existing lawn shorter than usual, remove clippings, and rake away leaves and thatch. Seed needs contact with soil, not a blanket of old stems. In thin areas, a core aerator or slit seeder can improve the chances that seed reaches the surface.
Step 3: Measure the area and seed at the label rate
Measure the lawn in square feet so you can purchase the correct amount of seed. Divide irregular areas into rectangles or smaller shapes, calculate each area, and add the totals. Then follow the product label or local extension recommendation for your chosen grass.
Do not assume that more seed always produces a thicker lawn. Overcrowded seedlings compete for water, light, and nutrients, which can lead to weak growth. Too little seed, on the other hand, leaves open ground where weeds can establish.
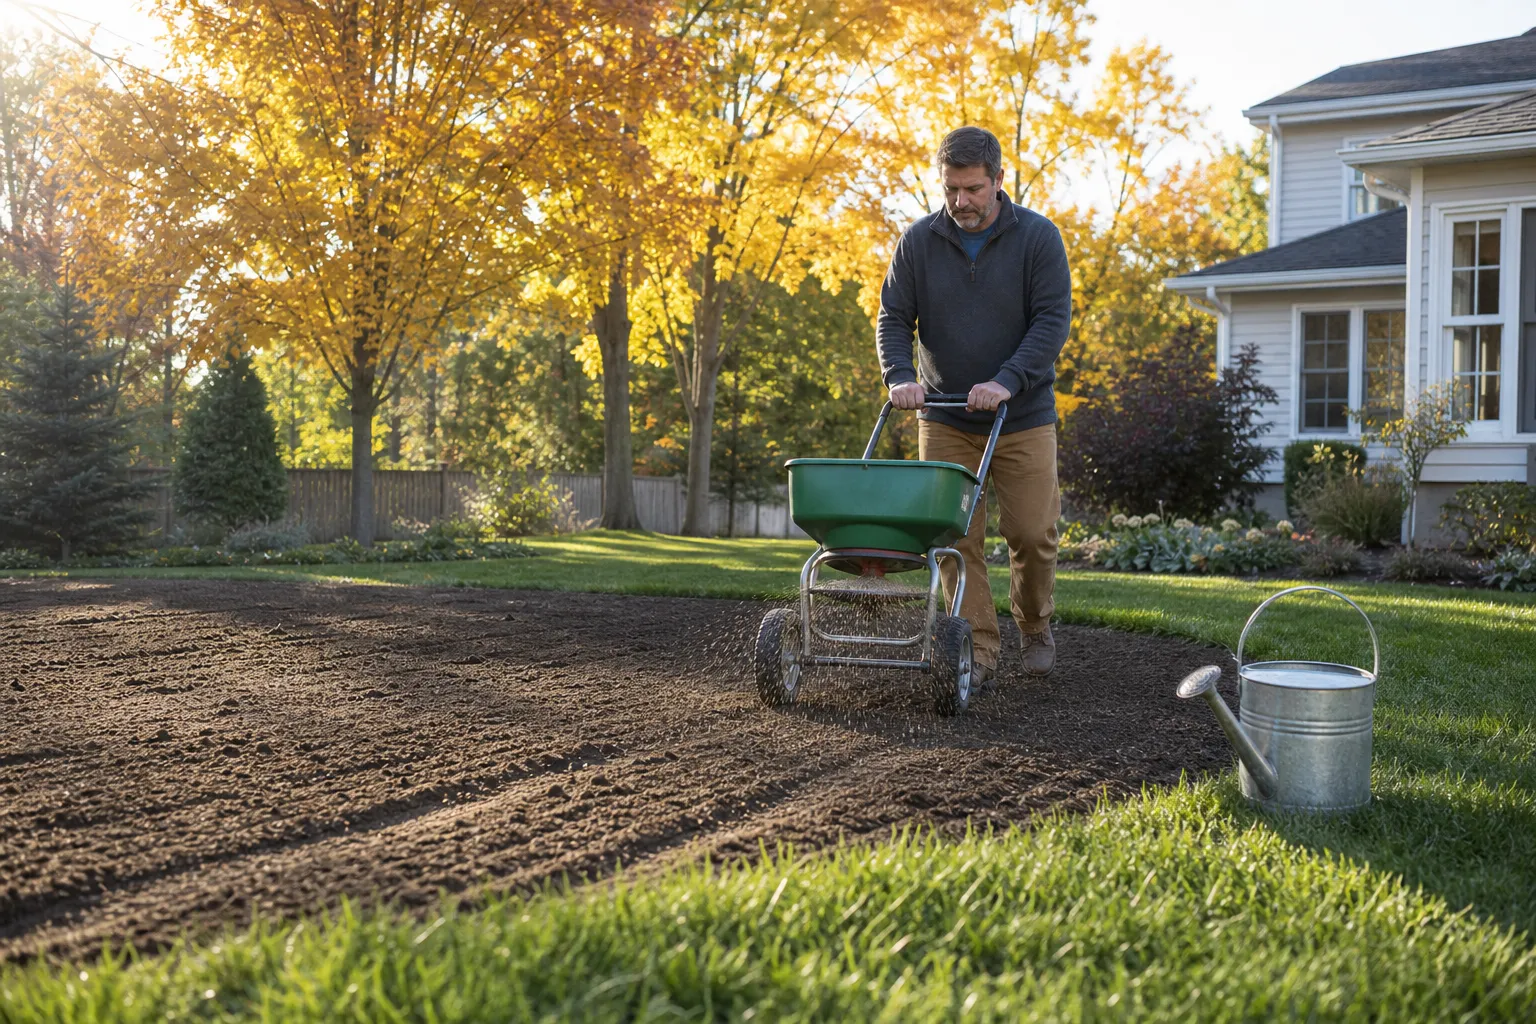
For even coverage, divide the seed into two equal portions. Spread the first portion while walking east to west, then apply the second while walking north to south. Use a calibrated broadcast or drop spreader when possible. For a small patch, you can spread by hand, but take your time and make several light passes rather than one heavy pass.
Step 4: Rake lightly and protect the surface
Grass seed generally belongs near the soil surface. After broadcasting, drag a leaf rake upside down over the area or rake very lightly so that some seed is nestled into the top layer. Avoid burying it deeply.
A thin layer of clean straw or another labeled lawn mulch can reduce drying and help prevent erosion. Keep the layer light enough that you can still see portions of the soil. Heavy mulch can block light and trap excess moisture around emerging seedlings. On slopes, erosion-control blankets or other site-appropriate products may be more reliable than loose straw.
Step 5: Water with a measurement, not a guess
During germination, the upper surface must remain consistently moist. That does not mean flooding the soil. Gentle, frequent watering is usually more effective than a powerful spray that moves seed downhill.
Set out several shallow tuna cans, straight-sided jars, or rain gauges in the seeded area while a sprinkler runs. Measure the water collected and note how long it takes. A practical starting point is to apply roughly one-quarter inch of water per session, adjusting for sun, wind, soil, and rainfall. If the surface dries within a few hours, use shorter cycles or a light covering to slow evaporation. If puddles form or water runs off, divide the application into shorter cycles.
Check the seedbed twice daily during warm or windy weather. The surface should feel damp, not muddy. Once most seedlings have emerged, gradually shift to deeper, less frequent watering. For example, move from several brief daily sessions to one longer session every day, then to every other day as roots grow and weather permits. The exact schedule depends on soil and rainfall, so use a trowel to inspect moisture below the surface rather than relying only on the color of the grass.
A simple watering test for your lawn
- Place three or four identical containers across the seeded area.
- Run the sprinkler for 10 minutes.
- Measure the average depth of water in the containers.
- Repeat the timing until you know how long your system takes to deliver about one-quarter inch.
- Move the containers to another zone if your sprinkler covers unevenly.
This small test is more dependable than a timer setting copied from another yard. Sandy soil may need more frequent watering, while clay soil may require slower applications to prevent runoff.
Step 6: Watch germination and protect young grass
Germination time depends on species, soil temperature, moisture, and weather. Perennial ryegrass often appears quickly, while Kentucky bluegrass can take considerably longer. Do not panic if a mixed lawn emerges unevenly; different species naturally germinate at different speeds.
Keep people, pets, and equipment off the area as much as possible. Foot traffic can disturb shallow roots and press wet soil flat. If leaves begin covering the seedlings, remove them gently with a leaf blower on a low setting or a lightweight rake held above the surface.
Weeds may appear alongside the grass. Avoid reacting with a product unless you have identified the weed, checked the grass species, and read the entire product label. Young turf can be sensitive, and some weed-control products require a waiting period after seeding.
Step 7: Mow at the right height
Wait until the new grass is tall enough to mow without pulling from the soil. A common target is about 3 to 3½ inches for the first cut, although the best height depends on the grass mixture. Make sure the mower blade is sharp, the soil is not soggy, and you remove no more than about one-third of the leaf height at a time.
Mowing encourages the young plants to branch and fill in. Avoid scalping the lawn in an attempt to make it look tidy. A slightly taller fall lawn generally provides more leaf area for growth and better protection as temperatures decline.
New lawn or overseeding: which approach fits?
Starting from bare soil gives you control over grading and seed placement, but it requires more preparation and leaves the ground vulnerable to erosion. Overseeding is faster and less disruptive when the existing lawn is mostly healthy, but old thatch, compacted soil, poor grass selection, and heavy weed pressure can limit results.
Try a small comparison patch if you are uncertain. Seed one section with a tall-fescue blend and another with a locally recommended bluegrass-fescue mixture, keeping preparation and watering identical. Label each section and record germination, density, mowing response, and summer performance. This simple experiment can reveal more about your yard than a generic “best grass” list.
Common mistakes that thin out a fall lawn
- Seeding after the soil has become too cold for reliable germination
- Choosing a grass that does not match the yard’s sun, heat, or traffic
- Spreading seed over leaves, thatch, or hard-packed soil
- Applying seed unevenly or ignoring the label rate
- Letting the seedbed dry repeatedly during germination
- Watering so heavily that seed washes away or soil becomes saturated
- Mowing too early or removing too much leaf tissue
- Walking on the area while the soil is wet
Give your lawn time to mature
A fall-seeded lawn may look uneven before winter, especially when it contains several grass species. Focus on steady establishment rather than instant perfection. Fill small bare spots when conditions are still favorable, continue mowing as needed, and avoid heavy traffic until the ground is firm.
With the right seed, a prepared seedbed, measured watering, and patient care, autumn can set up your lawn for a strong spring. Start with a manageable section if the whole yard feels overwhelming. Each careful step now brings you closer to a thicker, healthier lawn next year.