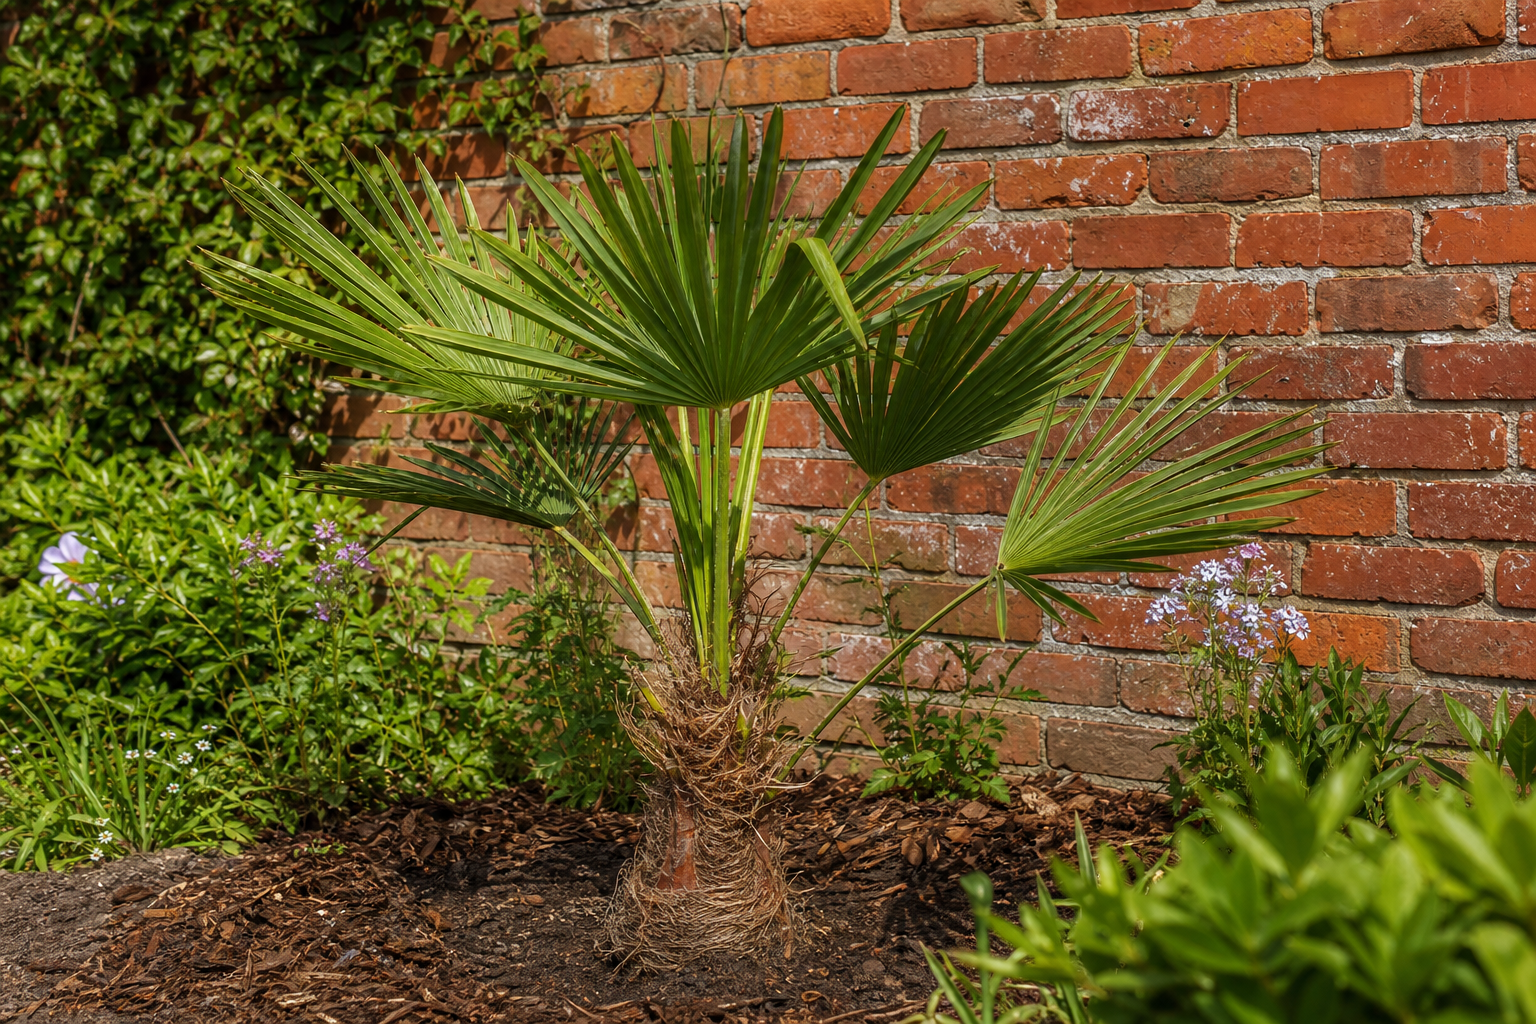
Want a palm that brings tropical character without demanding a tropical climate? The windmill palm, Trachycarpus fortunei, is one of the best choices for gardeners in much of the United States. Its rounded fan leaves, slim trunk, and shaggy brown fibers create an instantly recognizable look, while its relative cold tolerance makes it more practical than many classic landscape palms.
Even this forgiving palm has a few non-negotiable needs. The biggest mistakes usually involve planting it too deeply, leaving the root ball waterlogged, or placing it where winter wind can shred the foliage. Follow these seven tips and you will give your palm the strongest possible start.
First, choose the right windmill palm
Most plants sold as windmill palm are Trachycarpus fortunei, sometimes labeled Chinese windmill palm, Chinese fan palm, or Fortune palm. In a suitable site, a mature specimen may eventually reach roughly 20 to 40 feet in its native environment, but cultivated plants are often smaller, especially in cooler regions or containers. Plan for a handsome accent plant rather than an instant canopy tree.
Before you buy, compare the plant’s eventual size with nearby walks, driveways, windows, overhead wires, and rooflines. A young palm may look modest at the garden center, but it needs enough room for a trunk and crown to develop without constant pruning or rubbing against structures.
1. Match the palm to your climate
Windmill palm is generally listed for USDA Hardiness Zones 7 through 11, although winter performance depends on more than a zone number. Exposure to drying wind, the length of a cold spell, soil moisture, plant age, and the individual palm can all influence damage. A sheltered, established palm may tolerate cold better than a newly planted one in an exposed location.
For many gardeners, the safest approach is to treat Zone 7 as the cool edge of its reliable outdoor range. In colder parts of Zone 7, choose a protected microclimate and be prepared to shield a young palm during severe freezes. In Zones 8 through 10, outdoor planting is usually more straightforward, though cold snaps can still damage leaves.
Give extra thought to borderline climates
- Choose a south- or southeast-facing position near a wall, fence, or building.
- Avoid low spots where cold air settles overnight.
- Do not assume a mild average winter protects the palm from an occasional hard freeze.
- In colder areas, grow a smaller specimen in a container so you can move it to shelter.
Remember that cold injury to the leaves does not always mean the growing point has died. Wait until spring growth clearly resumes before removing damaged foliage. Brown leaves can look discouraging, but the palm may recover if the central bud remains healthy.
2. Pick a bright site with wind protection
Windmill palms can grow in full sun, but many perform beautifully in light shade or bright filtered light, particularly when young. A site with morning sun and afternoon protection can reduce heat and moisture stress while still providing enough light for steady growth.
Wind deserves special attention. Strong gusts can tear the large fan leaves, leaving the palm alive but ragged. Cold wind is even more troublesome because it increases moisture loss while temperatures are already stressing the plant. Position the palm where a house, solid fence, evergreen shrub, or group of trees breaks the prevailing wind without blocking all available light.
Compare two common planting situations
- Open lawn: bright and easy to access, but often exposed to wind and reflected heat. This site may require more irrigation and winter protection.
- Sheltered courtyard or foundation bed: usually warmer and less windy, but check that roof runoff does not collect around the root zone.
Leave enough clearance for the fronds. Even a palm with a narrow trunk can develop a crown several feet wide, and leaves pressed against a wall will suffer mechanical damage.
3. Make drainage your priority
Windmill palm is adaptable to different soil textures, including loam and some clay, but it does not appreciate permanently soggy ground. Poor drainage deprives roots of oxygen and increases the risk of root problems. If your soil stays wet for days after rain, solve that issue before planting rather than hoping the palm will adapt.
Test the planting hole
- Dig a hole about 12 inches deep and 12 inches wide.
- Fill it with water and let it drain completely.
- Fill it again and check the water level after one hour.
If the water drains slowly or remains for many hours, choose a better-drained location, raise the planting area slightly, or improve the site with a broad mound or berm. Do not simply dig a deep hole and fill it with loose soil; that can create a bowl that collects water around the root ball.
When planting in dense clay, work with the existing landscape rather than creating a pocket of radically different soil. A palm planted on a gentle mound often fares better than one placed in a deep, amended hole. Keep mulch away from the trunk so moisture does not remain trapped against the fibrous stem.
4. Plant at exactly the right depth
Planting depth is one of the most important details for palms. Set a container-grown windmill palm so the top of its root ball sits level with, or just slightly above, the surrounding soil. Never bury the trunk or cover the growing point with soil.
Dig the hole wider than the root ball but no deeper than its existing height. This encourages roots to grow into the surrounding soil while preventing the plant from settling too low. If the root ball is tightly circling the container, gently loosen a few outer roots, but avoid aggressively tearing the root system apart.
A simple planting sequence
- Water the palm in its container a few hours before planting.
- Dig a hole roughly twice the root ball’s width and no deeper than the root ball.
- Set the palm upright and check the depth from several angles.
- Backfill with the soil removed from the hole unless a soil test or local expert recommends a specific amendment.
- Firm the soil gently to remove large air pockets without compacting it.
- Water slowly and thoroughly after planting.
A palm planted too deeply may grow poorly and develop nutritional problems. One planted too shallowly may be unstable as new roots emerge. Take an extra five minutes to check the soil line before you fill the hole.
5. Water with a measuring plan
Newly planted palms need consistent moisture while roots extend beyond the original root ball. At the same time, frequent shallow watering can keep the surface wet while deeper soil remains dry. The goal is a thoroughly moistened root zone followed by partial drying near the surface.
For a container-grown palm, begin with approximately 5 gallons of water at planting, applied slowly around the root ball and surrounding soil. During the first two weeks, check the soil every day. If the top 2 to 3 inches feel dry, apply about 3 to 5 gallons, adjusting for rainfall, soil type, and plant size.
From weeks three through eight, a useful starting schedule is 5 to 10 gallons once or twice per week during dry weather. Sandy soil may need more frequent watering; clay soil may need less. After the palm is established, water deeply during extended dry periods rather than following a fixed calendar.
How to measure irrigation
Place a straight-sided container under the hose or sprinkler and time how long it takes to collect 1 inch of water. For drip irrigation, total the output of all emitters around the palm. For example, four 1-gallon-per-hour emitters running for 90 minutes deliver 6 gallons. This simple calculation is more reliable than guessing from hose time alone.
- Water at the soil surface, not into the crown.
- Use a 2- to 3-inch layer of organic mulch to slow evaporation.
- Keep mulch several inches away from the trunk.
- Reduce irrigation after prolonged rain and increase it during hot, dry, windy weather.
Yellowing leaves can have several causes, including water stress, drainage problems, nutrient issues, or natural aging. Look at the entire plant and the soil before reaching for fertilizer.
6. Feed lightly and avoid unnecessary pruning
A windmill palm does not need a heavy feeding at planting. First let it establish a healthy root system. If growth is weak or leaves show an unusual pattern of yellowing, have the soil tested before applying nutrients. Palms can develop deficiencies when the soil lacks particular minerals, but adding fertilizer without identifying the problem can make matters worse.
Once established, use a slow-release palm fertilizer according to the product label and local recommendations. Choose a product formulated for palms rather than a general lawn fertilizer, and keep granules away from the trunk. Water after application if the label directs you to do so.
Prune only completely brown, dead fronds or damaged flower stalks when needed. Avoid cutting green leaves simply to make the palm look tidier. Green fronds still contribute energy to the plant, and unnecessary pruning can reduce vigor. Never cut into the central spear or growing point.
7. Prepare young palms for winter
Windmill palm is among the more cold-tolerant landscape palms, but young plants remain more vulnerable than established specimens. Winter protection is most important during the first few years, especially in Zone 7, exposed sites, and areas with sudden temperature drops.
Before a hard freeze
- Water the root zone if the soil is dry, but do not leave the area saturated.
- Move container palms into an unheated garage, shed, or bright sheltered space when practical.
- Wrap the trunk loosely with frost cloth or breathable fabric if severe cold is forecast.
- Protect the crown with breathable material during short, hard freezes.
- Remove coverings when temperatures moderate so heat and moisture do not build up.
Do not wrap a palm in plastic and leave it in place for days. Plastic can trap moisture and heat, creating a poor environment for the foliage and growing point. Also avoid tying fronds tightly for long periods; temporary protection should not become permanent compression.
Windmill palm varieties worth comparing
Trachycarpus fortunei is the standard choice, but you may also encounter other windmill-palm relatives or selected forms. Compare the label carefully because cold tolerance, mature size, leaf shape, and availability vary.
- Standard windmill palm: broad, rounded fan leaves and a fibrous trunk; a dependable specimen for many temperate landscapes.
- Wagner palm, often sold as Trachycarpus wagnerianus: typically has smaller, stiffer leaves that may resist tearing better in exposed gardens. Names and classification can vary in nursery trade.
- Selected dwarf or compact forms: useful for patios and smaller yards, but check the expected mature size rather than relying on words such as “compact.”
If you are choosing between two plants of the same type, favor the one with a firm root ball, evenly green foliage, an intact central spear, and no sour smell or constantly soggy soil. A smaller, healthy palm often establishes more reliably than an oversized specimen that has been stressed in a container.
A small planting experiment that teaches you a lot
If you have room, try a simple side-by-side observation rather than planting several palms randomly. Place one palm in morning sun with afternoon protection and another in a brighter, windier location. Give both the same measured irrigation, mulch depth, and planting depth.
For the first eight weeks, record rainfall, irrigation volume, new leaf emergence, and leaf tearing. You may find that the sheltered palm needs less supplemental water and produces cleaner foliage, while the more exposed palm shows wind damage even when its soil moisture is adequate. This kind of small experiment helps you understand your own microclimate better than a generic care calendar.
The foolproof checklist
- Choose a site suited to your USDA Hardiness Zone and local winter exposure.
- Provide bright light, with protection from strong wind whenever possible.
- Test drainage before planting.
- Set the root ball level with the soil surface; never bury the trunk.
- Water deeply and measure approximately how much you apply.
- Mulch the root zone, leaving space around the trunk.
- Feed only when needed, and prune conservatively.
- Protect young palms during severe freezes.
Planting a windmill palm successfully is less about creating perfect soil and more about getting the basics right: a suitable site, excellent drainage, correct depth, and steady moisture during establishment. Choose a healthy plant, observe how it responds, and adjust your care to the weather. With that simple approach, you can enjoy a striking palm that feels tropical without requiring a tropical address.