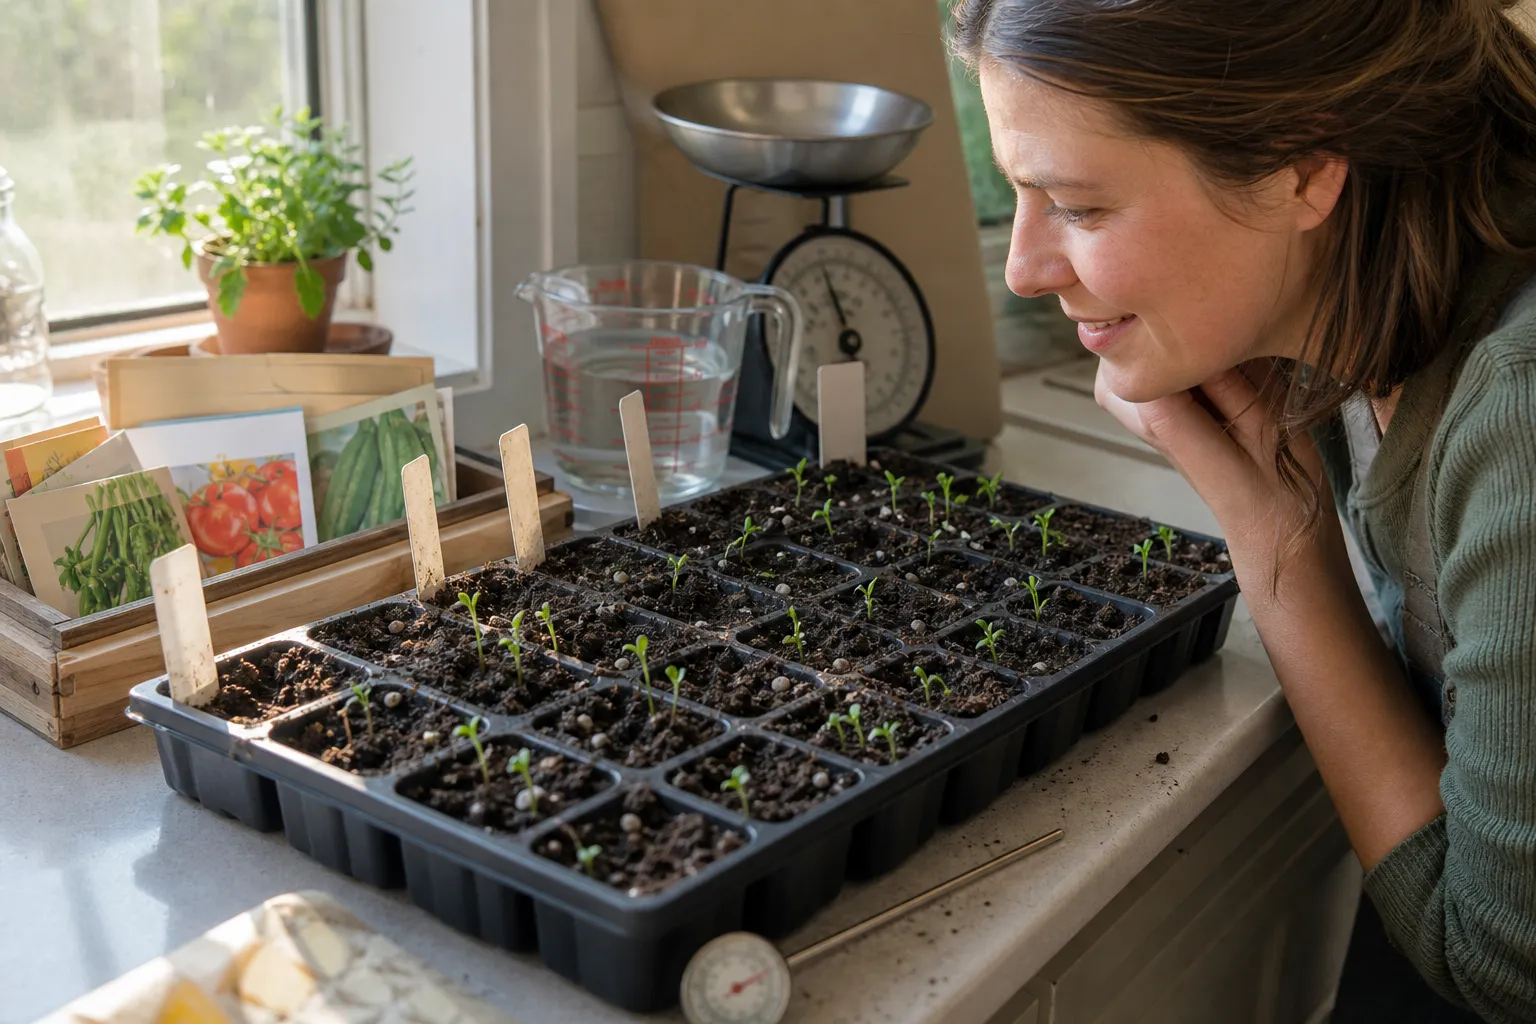
There is a special kind of gardening suspense in a seed tray that appears to be doing absolutely nothing. You check it in the morning, check it again after dinner, and eventually decide the seeds must be duds. Then, usually just after you stop paying attention, a tiny green hook pushes through the soil.
That late appearance is not always a miracle—and it does not necessarily mean you did anything wrong. Seeds follow their own biological timetable. Some need a very specific temperature window, some must absorb enough water before they can begin, and others are alive but naturally dormant. A few simply germinate slowly, especially when conditions are close to suitable but not quite ideal.
The good news is that patience works best when you pair it with observation. Once you understand what is happening beneath the surface, you can give slow seeds a better chance without drowning them, overheating them, or disturbing them too soon.
A seed can be alive without being ready to sprout
Gardeners often treat germination as a simple yes-or-no test: the seed either sprouts or it does not. In reality, an ungerminated seed may be dead, damaged, dormant, or simply waiting for a missing environmental cue.
Viability means a seed still has the capacity to produce a normal plant. Germination is the visible process that begins when the embryo resumes growth and the root emerges. A viable seed can fail to germinate during a short test period, particularly if the species has built-in dormancy.
In nature, that delay can be a survival advantage. If every seed sprouted during one brief warm spell, a later freeze, drought, flood, or hungry animal could wipe out an entire generation. Staggered germination spreads the risk across time.
The hidden countdown inside the seed
Before a seed can send out a root, it must take in water. This first stage, called imbibition, causes the seed to swell and softens the seed coat. Inside, stored food begins to break down, respiration increases, and the embryo starts producing the energy and proteins needed for growth.
That internal work can take place for days before you see anything above the soil. The seed is not necessarily inactive; it may be preparing for the moment when the root can break through.
Several factors control that countdown:
- Moisture: The seed needs steady access to water, but not a saturated, airless environment.
- Temperature: Each crop has a preferred range. Cool soil can slow warm-season crops dramatically.
- Oxygen: Germinating seeds respire. Compacted or waterlogged media can restrict gas exchange.
- Light: Some seeds need light, while others germinate best when covered and kept dark.
- Seed condition: Age, storage humidity, damage, and harvest maturity all affect performance.
If even one of these conditions is slightly off, germination may stretch from a few days into a couple of weeks—or longer for naturally dormant species.
Temperature is often the real culprit
A seed packet may tell you how many days germination usually takes, but that estimate assumes reasonably favorable conditions. Indoor air temperature is not the same as soil temperature, and a windowsill can be surprisingly variable.
Cool-season crops such as lettuce, onions, spinach, and peas can begin in relatively cool soil. Warm-season crops such as peppers, eggplants, cucumbers, squash, and melons generally need warmer conditions. A pepper seed sitting in a 62°F room may be alive but progressing very slowly, while a seed-starting setup closer to its preferred range can produce a much more even emergence.
Try measuring the growing medium instead of guessing from the room. A simple soil thermometer inserted about 2 to 3 inches deep can reveal why one tray is thriving while another is stalled. Follow the crop-specific temperature guidance on the packet, because “warmer” is not always better. Excessive heat can reduce germination or damage delicate seeds.
Why a temperature change can trigger a late flush
Seeds respond to patterns, not just single readings. A tray may remain cool overnight and warm during the day, or a cloudy week may suddenly give way to several sunny afternoons. That shift can move conditions from “nearly suitable” to “good enough,” causing several seeds to emerge at once.
This is one reason a neglected pot sometimes seems to germinate after you give up. You may have stopped checking just as the temperature, moisture, and oxygen balance finally came together.
Water helps—but too much can work against you
Inconsistent moisture is one of the most common reasons for delayed germination. If the seed dries out repeatedly after beginning to swell, the process may pause or fail. On the other hand, constantly soggy media can push air out of the pore spaces and create conditions that slow the seed or encourage seedling problems.
Aim for media that feels evenly moist, like a wrung-out sponge. It should not release water when you squeeze it, and the surface should not become dusty between waterings.
A small watering experiment worth trying
If you want to understand your own setup, compare two identical batches of seeds rather than relying on memory. Use the same variety, container, potting mix, planting depth, and location. Water one tray by weight and the other by visual inspection.
- Before watering, weigh each tray on a kitchen scale and record the number.
- Add about 2 fluid ounces of water to a small 6-inch seed-starting container, or enough to moisten the mix without creating runoff.
- Reweigh the tray and note the difference.
- Water again only when the tray has lost roughly 5 to 10 percent of its watered weight, unless the seed packet or growing medium behaves differently.
- Record the date of each emergence, not just the final number of seedlings.
This is not a universal watering formula; container size and potting mix matter. The value lies in replacing “it looks dry” with a repeatable measurement. You may discover that your tray loses water much faster near a sunny window or much more slowly under a humidity dome.
Different varieties can behave like different personalities
Even within the same crop, varieties can germinate at different speeds and percentages. A fast-growing cherry tomato may emerge before a larger, slower variety. One lettuce cultivar may perform well in cool spring conditions, while another prefers slightly warmer soil.
Seed age and storage history can also vary between packets. A seed lot stored cool and dry may outperform an older lot that spent months in a hot, humid garage. The printed “packed for” date offers useful context, but it cannot tell you everything about storage conditions.
Compare varieties fairly
For a practical home comparison, sow 10 seeds each of two varieties. Label everything clearly and keep the trays together. Count normal seedlings on the same schedule—for example, once daily after the first sprout appears—and continue until the period recommended on the seed packet has passed.
Track three numbers:
- First emergence: How many days until the first seed appears?
- Speed: How many seedlings emerge by day 5, day 7, or another consistent checkpoint?
- Final count: How many healthy seedlings emerge by the end of the expected germination window?
If one variety reaches 8 out of 10 seedlings by day 7 and another reaches 5 out of 10 by day 12, that difference is useful information for your garden. It does not automatically prove one variety is better; it may simply be better matched to your temperature, timing, or growing method.
Dormancy: the seed’s built-in pause button
Some seeds remain dormant even when they have water, air, and a suitable temperature. Dormancy can come from a hard seed coat, chemical inhibitors inside the seed, an immature embryo, or a requirement for a particular sequence of warm and cold conditions.
Many native plants and some perennial flowers are especially likely to need a dormancy-breaking treatment. In the wild, winter, alternating temperatures, passage through seasonal moisture cycles, or gradual weathering may provide the necessary signal.
Common techniques include:
- Scarification: Gently scratching or nicking a hard seed coat so water can enter more easily.
- Soaking: Softening certain large or hard-coated seeds before sowing.
- Cold, moist stratification: Keeping seeds moist and cool for a species-specific period before planting.
- Light exposure: Leaving very small seeds on the surface when the packet indicates they need light to germinate.
Use the instructions for the exact plant. Do not automatically refrigerate, soak, or scarify every slow seed. Some treatments can reduce success when applied to the wrong species, and certain seeds need a precise combination of conditions rather than one simple trick.
Why “doing nothing” sometimes works
When gardeners become discouraged, they often change several things at once: they water more heavily, move the tray to a warmer spot, dig around to inspect the seeds, or reseed directly on top. Any of those actions can disrupt a seed that was already close to emerging.
Leaving the tray alone may accidentally provide exactly what it needs: stable moisture, undisturbed roots, and time. The apparent breakthrough after giving up is often a coincidence of timing, not evidence that neglect is a superior gardening method.
Instead of abandoning the tray, shift into “low-intervention mode.” Check the surface once a day, confirm that the mix remains evenly moist, and avoid digging up seeds to see whether they are working. If the container is covered, allow some ventilation and remove the cover as seedlings emerge.
When to wait—and when to start over
Use the seed packet’s germination range as a guide, not a guaranteed deadline. If a crop usually emerges in 5 to 10 days, a few late seedlings may still appear after that window, especially under cool conditions. For plants with known dormancy, the expected timeline may be much longer.
It is reasonable to start a fresh germination test when:
- The expected germination period has passed by a substantial margin.
- The media has repeatedly dried out or remained waterlogged.
- The temperature has been far outside the crop’s preferred range.
- The seeds are old, poorly stored, cracked, or discolored in a way that suggests damage.
- No seeds germinate in a controlled paper-towel test.
For a simple test, place 10 seeds between damp—not dripping—paper towels in a loosely closed plastic bag. Keep the bag at the temperature recommended for that crop and check it daily. Count roots as they appear, then transplant promptly and gently once they are large enough to handle.
Give slow seeds a better second chance
Before discarding a stubborn tray, run through this quick checklist:
- Read the packet again for temperature, light, depth, and dormancy instructions.
- Measure soil temperature rather than relying on room temperature.
- Check moisture below the surface with a finger or by weighing the container.
- Make sure the container drains freely and the mix is not compacted.
- Confirm that tiny seeds were not buried too deeply.
- Compare the actual number of days since sowing with the full germination range.
- Resist disturbing the seed unless you have a clear reason to do so.
Then give the tray a few more days if the conditions are sound. Germination is not a race between you and the seed. It is a conversation between the seed and its environment, and sometimes the most useful thing you can do is make that environment steady enough for the seed to finish speaking.
The reward of waiting well
Late germination can teach you more than a tray of instant seedlings. It reminds you that seeds differ by species, variety, age, and history—and that “nothing is happening” is not always an accurate diagnosis.
Keep notes, measure when you can, and compare varieties under the same conditions. With a little practice, you will learn which seeds in your garden need warmth, which prefer cool soil, which demand light, and which simply need more time. And the next time a tiny green shoot appears after you nearly give up, you will know it was not being difficult. It was waiting for the right moment.