Brown tips can make a healthy-looking houseplant seem suddenly doomed. The good news is that brown tissue is often a message about growing conditions—not a death sentence. Your plant may be telling you that its roots are struggling, the air is too dry, the potting mix is staying wet too long, or fertilizer salts have built up around the roots.
The tricky part is that several different problems can create a similar symptom. Instead of reacting with more water or more fertilizer, treat the leaf tips as clues. Look at the whole plant, check the potting mix and roots, and consider what changed recently in your home.
First, notice exactly where the browning appears
Brown tissue at the very tip is different from brown patches in the middle of a leaf, yellowing across the whole plant, or soft black areas near the stem. The pattern helps narrow the possibilities.
- Dry, crisp tips or edges: often point to moisture stress, dry indoor air, inconsistent watering, or salt buildup.
- Brown areas in the middle of leaves: may be linked to overly wet roots, physical damage, sun exposure, or leaf-spot problems.
- Yellow leaves with soft stems or a sour-smelling pot: suggest that the roots may be staying too wet.
- Scattered speckles, webbing, sticky residue, or distorted new growth: make pests more likely than a simple watering issue.
- One or two old leaves turning brown: may simply reflect natural aging.
No single symptom proves a single cause. A good diagnosis combines the leaf pattern with the plant’s watering history, light, temperature, pot, and recent changes.
The most common causes of brown leaf tips
1. The plant is getting too dry between waterings
When roots cannot supply water as quickly as leaves lose it, the leaf margins and tips are often the first areas to dry out. You may also see drooping, curling, dry potting mix pulled away from the sides of the container, or lower leaves turning brown and dropping.
This is especially common when a plant sits near a heat register, fireplace, sunny window, or frequently opened exterior door. A plant can also dry out because its root ball has become tightly packed with roots and no longer absorbs water evenly.
Rather than watering by the calendar, check the soil. Insert a finger about 1 to 2 inches into the mix, or lift the pot to compare its weight after watering and as it dries. The right interval varies widely: a small plant in a bright room may need water every few days, while a large plant in a dim room may go much longer.
2. The roots are staying too wet
Overwatering does not simply mean giving a plant a large drink. More often, it means watering again before the potting mix has had time to drain and the roots have received enough air. Constantly saturated mix can damage roots, reducing the plant’s ability to move water to the leaves. The result may be brown tips, yellowing, wilting, or leaf drop—symptoms that can look surprisingly similar to drought.
Check whether the container has drainage holes and whether water can escape freely. If the pot sits inside a decorative cachepot, empty the outer container after watering. A plant with dark, soft, collapsing roots or a persistent sour odor needs more urgent attention than a plant with merely dry tips.
3. Indoor air is too dry
Low humidity can increase water loss from leaves, particularly for ferns, calatheas, prayer plants, some palms, and other moisture-loving species. Winter heating often makes indoor air especially dry in homes across the United States, but air conditioning can create a similar problem during summer.
Humidity is not the same as wet soil. Adding water to a dry room will not help if the roots are sitting in soggy mix, and misting leaves usually provides only brief relief. More dependable options include grouping plants together, using a room humidifier, or placing a plant on a pebble tray with water kept below the level of the pebbles.
Improve air movement as well. Crowded, stagnant conditions can encourage leaf problems, while a gentle circulation fan can help leaves dry after watering. Avoid placing plants directly in the stream of hot or cold air.
4. Fertilizer salts have built up
Brown, scorched-looking tips can appear after repeated heavy feeding or when mineral salts accumulate in the potting mix. This is more likely when you fertilize a stressed plant, use a stronger solution than the label recommends, or apply fertilizer to very dry roots.
For most indoor plants, more fertilizer does not mean faster, healthier growth. During active growth, use a complete houseplant fertilizer according to its label and avoid increasing the strength because the plant looks pale or slow. Plants in low light generally use nutrients more slowly than plants growing in bright light.
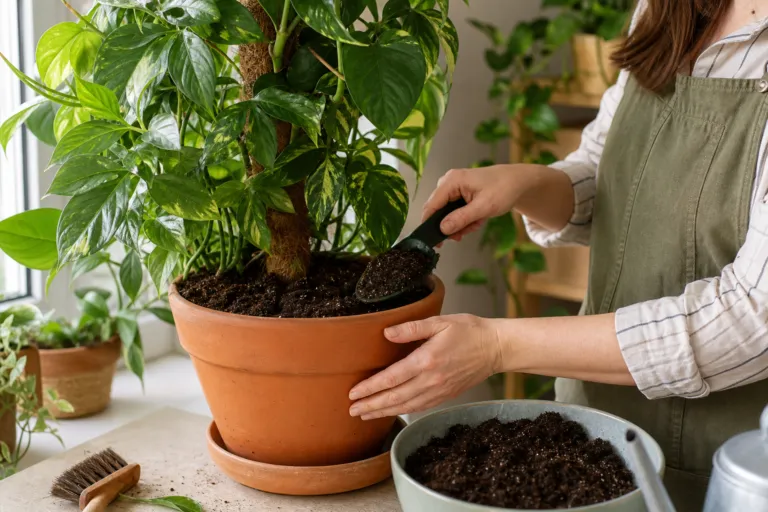
If salt buildup seems likely, water the plant thoroughly with plain water and allow excess water to drain completely. Repeating this occasionally can help move soluble salts out of the mix, but do not flush a plant that has poor drainage or roots already suffering from rot. In severe cases, replacing the potting mix may be more appropriate.
5. Water quality may be contributing
Some plants are sensitive to minerals or fluoride in water, and the symptoms can include brown tips or margins. Spider plants, dracaenas, and some palms are often discussed in connection with tip burn, but sensitivity varies by species and growing conditions.
Do not assume tap water is the culprit after seeing one brown tip. First rule out inconsistent watering, dry air, root trouble, and fertilizer buildup. If the same plant repeatedly develops fresh brown tips despite steady care, try rainwater where legal and safely collected, filtered water, or another suitable low-mineral source, and compare the new growth over time.
6. Light or temperature changed suddenly
A plant moved from a dim store or room into intense direct sun may develop bleached, tan, or brown patches. Conversely, too little light can slow water use and leave the potting mix wet for too long, increasing root stress.
Cold drafts, contact with cold glass, heat vents, and sudden moves between very different environments can also damage leaves. Tropical houseplants usually prefer stable indoor conditions rather than sharp temperature swings. Keep sensitive plants away from exterior doors, drafty windows, and heating or cooling outlets.
A simple diagnostic check you can do today
Before changing several things at once, spend five minutes collecting clues. Write down what you find; a short care record often reveals patterns that memory misses.
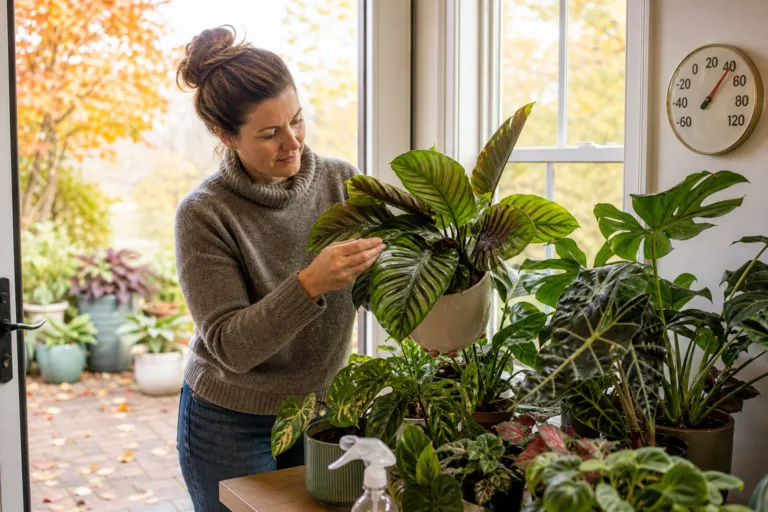
- Inspect the leaves. Note whether the tips are crisp, soft, spotted, curled, or accompanied by yellowing.
- Check the potting mix. Is it dry several inches down, slightly moist, or wet and heavy?
- Examine drainage. Confirm that the pot has holes and that water is not trapped in a saucer or outer pot.
- Look beneath the leaves. Check for webbing, insects, sticky residue, scale-like bumps, or fine speckling.
- Review recent changes. Think about a move, repotting, new fertilizer, vacation, heat wave, cold snap, or change in window light.
- Inspect roots only when needed. If the plant is persistently wilted in wet soil, gently slide it from the pot and look for firm, healthy roots rather than soft, collapsing ones.
What a small watering experiment can reveal
If you are unsure whether your routine is too frequent or too sparse, try a simple home experiment rather than guessing. Choose one plant that has drainage and record the pot’s weight immediately after thorough watering. Let excess water drain, then weigh it again if you have a kitchen or luggage scale that can safely support the pot.
For example, a 10-inch houseplant might weigh 18 pounds after watering and 14 pounds when the upper few inches are dry. Those numbers are not a universal target; they are simply measurements for that particular plant, pot, and mix. Water when the plant’s preferred drying point is reached, then compare how quickly the pot loses weight in different seasons.
You can also measure the amount of water used. If a container holds about 1 gallon of potting mix, try slowly applying 2 to 4 cups of water, then stop when a small amount begins to drain from the bottom. The correct amount depends on the pot, mix, root mass, and plant. The useful lesson is consistency: water thoroughly, let excess drain, and then wait until the mix reaches the plant’s appropriate drying level.
Different plants, different messages
Brown tips do not mean the same thing for every houseplant. Compare plants by their natural preferences rather than treating the entire collection alike.
- Spider plants: can develop brown tips from dry conditions, inconsistent watering, fertilizer salts, or sensitivity to water quality. They generally prefer bright, indirect light and a mix that dries somewhat between waterings.
- Peace lilies: may show brown tips when they repeatedly wilt, sit in constantly wet soil, receive too much fertilizer, or experience low humidity. Their dramatic droop is a useful reminder to check the mix before watering again.
- Snake plants: usually tolerate drier conditions and often suffer more from frequent watering than from modest dryness. Brown, soft areas near the base deserve particular attention.
- Ferns: often respond poorly to dry air and missed waterings, but they still need drainage. A humid room does not compensate for waterlogged roots.
- Dracaenas and palms: may show tip burn related to dry air, fertilizer buildup, water quality, or root stress. Look at the pattern and the newest growth before making a major change.
These are broad tendencies, not guarantees. Cultivar, pot size, indoor light, season, and potting mix can change the result. A compact, variegated cultivar may use water differently from a vigorous green form of the same species.
Should you cut off the brown tips?
Yes, you can trim dead tissue for appearance, but pruning will not reverse the underlying problem. Use clean, sharp scissors and follow the natural shape of the leaf rather than cutting into healthy green tissue. Leave a narrow brown margin if necessary; removing too much living tissue creates another wound.
Do not expect damaged tips to turn green again. Judge your correction by the condition of new leaves and by whether the spread of browning slows. One older leaf may remain marked even after the plant has returned to good health.
When brown tips need closer investigation
Take the problem more seriously when browning spreads quickly, affects many new leaves, or occurs with major leaf drop, soft stems, foul-smelling soil, or visible pests. Brown spots with distinct halos, numerous lesions, or wet-looking areas may involve a leaf-spot issue rather than a basic watering mistake.
Isolate a plant with suspected pests while you inspect nearby plants. Avoid applying pesticides or other products simply because a leaf looks brown. Correct identification matters, and product labels contain the legal directions for use, including which plants and indoor settings are covered.
The message behind the brown tip
Most houseplants do not need perfect conditions; they need reasonably steady ones. Check the roots, improve drainage, match watering to the plant and season, keep fertilizer modest, and protect leaves from harsh drafts or sudden sun.
Think of each new leaf as your progress report. The old brown tip may stay, but healthier new growth tells you that the plant is receiving a better balance of water, air, light, and nutrients. With a little observation—and fewer guesses—you can turn brown tips from a mystery into useful information.