There is a particular kind of gardening suspense in a cutting that looks perfectly alive but refuses to produce roots. The leaves stay green. The stem remains firm. Week after week, however, nothing seems to happen below the surface.
Before you reach for the pruners and start over, pause. Many cuttings spend their first weeks adjusting to life without a root system. Some plants root quickly, while others take a month or several months. A cutting that has not rooted yet is not necessarily a failed cutting – it may simply be working on a timetable you cannot see.
The trick is learning to distinguish slow from stuck. With a little observation, careful watering, and a willingness to wait, you can often rescue a cutting that would otherwise be discarded too soon.
First, decide whether the cutting is still alive
A healthy cutting does not need to look busy. It may sit quietly while it forms callus tissue and begins developing the first tiny roots. Instead of looking only for new leaves, check the condition of the stem and foliage.
Signs that waiting still makes sense
- The stem feels firm rather than hollow, mushy, or collapsing.
- The leaves remain reasonably turgid, meaning they still hold their shape instead of becoming limp.
- The cut end is dry and clean, not slimy or darkening rapidly.
- There is no sour smell from the rooting medium or standing water.
- A gentle test offers slight resistance, suggesting that roots may be beginning to anchor the cutting.
Do not tug hard. Newly formed roots are fragile, and pulling a cutting out simply to satisfy your curiosity can damage the very roots you are hoping to find. If you need to inspect it, slide a plant label, pencil, or small spatula under the cutting and lift only a little.
Signs that it is time to start again
- The stem has turned soft, black, gray, or translucent at the base.
- The cutting repeatedly wilts even though the medium is appropriately moist.
- Leaves yellow rapidly and drop while the stem deteriorates.
- The medium stays waterlogged for days and smells unpleasant.
- The cutting has dried completely and the stem snaps rather than bends slightly.
When rot has moved up the stem, starting with fresh material is usually more sensible than trying to save the original piece. Use a healthy, pest-free parent plant and clean your snips before taking another cutting.
Why some cuttings take their time
Rooting is influenced by the plant, the season, the type of cutting, and the conditions around it. A soft, actively growing tip often roots faster than a mature woody section, but “faster” does not mean “immediately.” Even easy houseplants can take several weeks before roots become obvious.
The cutting also has to balance two competing needs. It must retain enough moisture to avoid wilting, yet the base must receive enough air to form roots instead of rotting. Keeping the medium constantly saturated solves the first problem only by creating the second.
Temperature matters, too. Rooting generally proceeds more readily in a warm growing environment than in a chilly windowsill during the short days of winter. A room that feels comfortable to you may still provide too little light or warmth for vigorous propagation, especially near cold glass or a drafty door.
A simple home experiment: three cuttings, three approaches
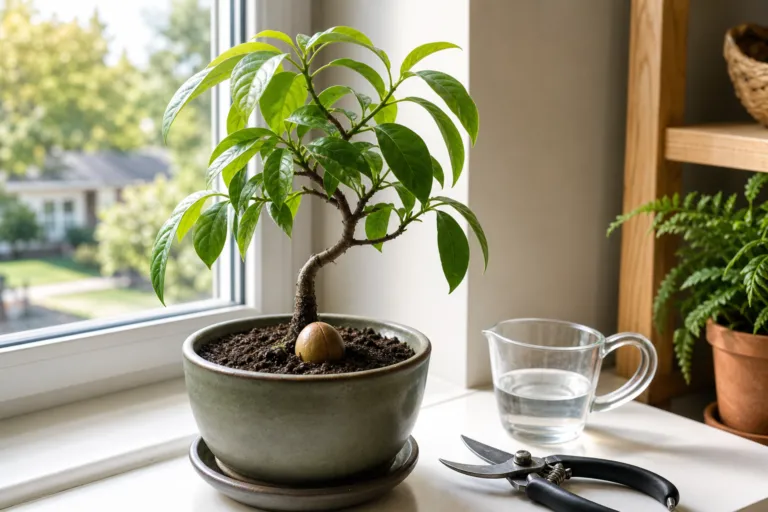
Last spring, I set up a small comparison with three cuttings from the same healthy houseplant. Each cutting was similar in length and had two visible nodes. One went into a lightly moistened perlite-based mix, one into a standard indoor potting mix, and one into a glass of water.
The test was not designed to prove that one method always wins. It was a practical way to see how different conditions affected the cuttings in one home. I labeled each container, kept them in bright indirect light, and recorded moisture rather than watering by habit.
- Perlite-based mix: the base stayed airy and the cutting showed modest resistance when checked after about four weeks.
- Potting mix: the cutting remained alive but stayed looser in the container for longer, partly because the mix held moisture more heavily.
- Water: roots were easiest to see, but the cutting needed a careful transition into potting mix later.
The important lesson was not that water is better or that perlite is best. It was that the cutting in the airy medium experienced fewer dramatic swings between dry and saturated. The cutting in the heavier mix needed less frequent watering, but it was easier to overdo it. Visibility also changed my behavior: because I could see the water-rooted cutting, I was less tempted to disturb it.
Watering: measure the medium, not your anxiety
Cuttings rarely need a complicated watering schedule. They need a consistent moisture level appropriate to the plant and the medium. Aim for evenly moist material – not dripping wet, muddy, or bone dry.
For a useful home routine, check the container once each day at roughly the same time. Press a finger about 1 inch into the surface, or lift the pot to notice whether it feels unusually light. Small containers can dry quickly, especially under a clear cover or near a heating vent.
A practical watering log
For one 4-inch pot holding a perlite-and-potting-mix blend, my sample log looked like this:
- Day 1: watered slowly with 3 fluid ounces, allowing a small amount to drain.
- Day 3: surface still moist; no water added.
- Day 5: upper 1 inch beginning to feel less moist; added 1.5 fluid ounces.
- Day 7: medium lightly moist and pot still moderately heavy; no water added.
- Day 9: added 2 fluid ounces after the container felt noticeably lighter.
This is not a universal formula. A leafy cutting in a warm, covered tray may need attention sooner than a nearly leafless succulent cutting. The measurement simply prevents the common cycle of adding a little water every day “just in case,” which can leave the bottom of the container permanently wet.
Always use a container with drainage. If water collects in a saucer, empty it rather than allowing the cutting to sit in it. A clear cover can reduce moisture loss, but leave room for air exchange and remove it if condensation remains heavy or mold appears.
Compare varieties instead of blaming yourself
Different varieties of the same plant may not root at exactly the same speed. A vigorous, flexible stem from one cultivar may respond differently from a thicker or more mature stem from another. This is one reason a single cutting is a poor judge of your technique.
Try taking several cuttings from the same parent plant, if it is healthy enough, and compare them under identical conditions. You can also compare varieties side by side, keeping the containers, light, medium, and watering method as similar as possible.
What to record
- Plant name and variety, if known.
- Date the cutting was taken.
- Whether it was a soft tip, semi-mature stem, or woody section.
- Number of nodes and leaves left on the cutting.
- Rooting medium and container size.
- First date you noticed resistance or visible roots.
You may discover that one variety roots in three to four weeks while another needs much longer. That information is more useful than a generic promise that every cutting should root by a particular day.
Improve the conditions without constantly rearranging the pot
Place the cutting in bright, indirect light. Strong direct sun can overheat a covered container and increase water loss from the leaves, while deep shade may slow the plant’s ability to produce new growth. A north- or east-facing window can work well indoors; a bright spot several feet from a stronger south- or west-facing window may be safer.
Warmth helps, but avoid placing cuttings directly on radiators, heating vents, or hot appliances. Sudden temperature swings can stress tender material. If your home is cool in winter, expect rooting to take longer rather than compensating with excessive watering.
Humidity can reduce wilting, especially for leafy cuttings. A loose clear bag or propagation cover may help, provided it does not press against the leaves. Open the cover regularly to refresh the air, and remove it gradually once the cutting begins to root and produce new growth.
When rooting hormone helps – and when it is not the answer
Rooting hormone contains plant-growth regulators that can encourage root formation in some cuttings. It is not a guarantee, and it cannot correct a badly timed cutting, a rotting stem, poor drainage, or an unsuitable plant.
For many easy houseplants and softwood garden plants, clean preparation and good conditions may be enough. If you use a commercial rooting product, follow the label exactly and use only a small amount. More product is not necessarily better, and excessive application can slow rooting.
Some plants are simply difficult to root from cuttings. For those, layering, division, seed, grafting, or purchasing a young plant may be more reliable. The best method depends on the plant – not on how determined you are to make one stubborn cutting cooperate.
Water-rooted cuttings need a gentle transition
Water makes root development easy to observe, which is why it is so tempting. Once roots appear, however, do not wait indefinitely for a dramatic tangle. Very long, delicate water roots can struggle when moved into a solid medium.
Pot the cutting when it has a small but useful cluster of firm roots. Use a small container with drainage and a light, well-aerated potting mix. Keep the mix evenly moist during the transition, then gradually move toward the plant’s normal watering pattern as new growth develops.
Expect a short pause after transplanting. The cutting is adapting again, this time from water to soil or potting mix. A quiet week does not automatically mean the transfer failed.
A decision guide for the stubborn cutting
Keep waiting if:
- The stem remains firm and the leaves are stable.
- The medium drains freely and is not staying saturated.
- The cutting is in a warm, bright, indirect-light location.
- You have checked for roots only gently and infrequently.
Adjust the setup if:
- The medium dries within a few hours of watering.
- The pot remains heavy and wet for several days.
- Condensation is constant inside the cover.
- The cutting is exposed to direct afternoon sun, a draft, or a heating vent.
- The cutting has too many leaves to support without roots.
Start again if:
- The base is soft, dark, or spreading with rot.
- The entire cutting has dried beyond recovery.
- The parent plant was already stressed, diseased, or heavily infested.
- Several weeks of stable conditions produce no roots and the cutting is steadily declining.
Patience is part of the propagation technique
The hardest propagation skill may be resisting the urge to interfere. Every time you pull up a cutting, repot it, change its location, or add more water, you reset part of the experiment. Give the cutting a stable environment and judge progress by its condition, not by the calendar alone.
Take more than one cutting when practical, label everything, and keep brief notes. If one fails, another may succeed – and your records will tell you whether the difference came from timing, variety, moisture, or simple chance.
A cutting that refuses to root is not always asking for a second attempt. Sometimes it is asking for steady care and a little more time. Watch closely, water thoughtfully, and start again only when the evidence says the cutting is truly finished.