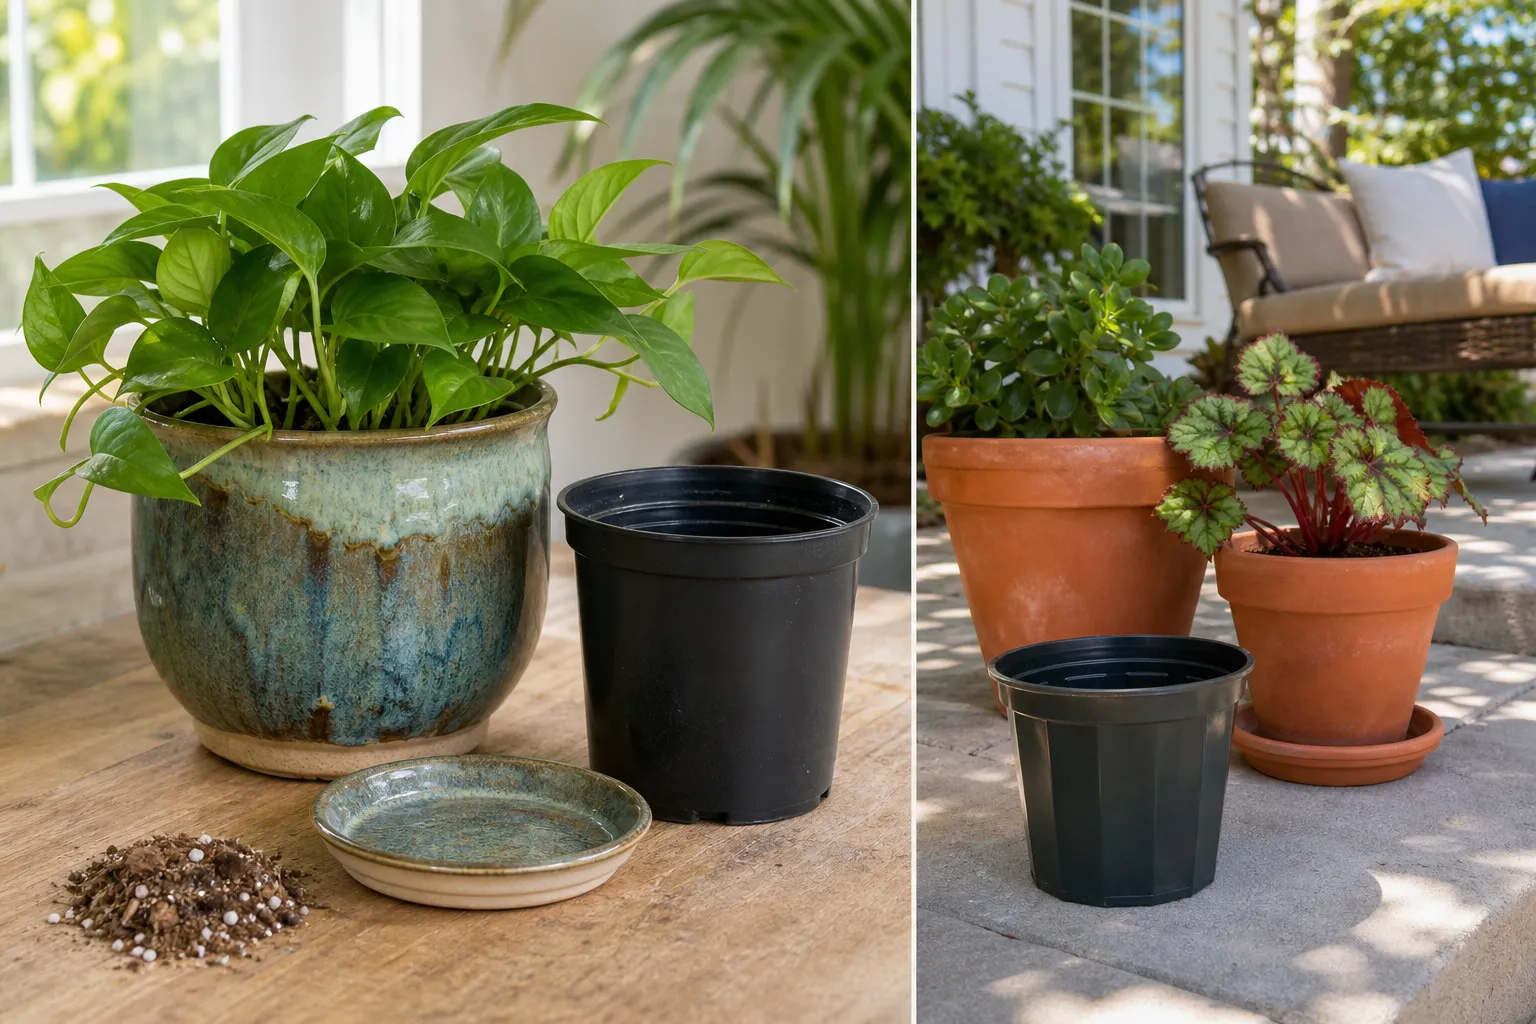
A plant can look instantly more stylish in a glossy ceramic planter, a sculptural concrete pot, or a charming vintage container. Yet the same plant that looked healthy in its plain black nursery pot may begin to droop, yellow, or stop growing after the upgrade.
The problem usually is not the plant—or your decorating taste. It is that nursery containers are designed primarily for growing plants, while decorative pots are often designed primarily for displaying them. The difference can affect drainage, root temperature, moisture levels, airflow, weight, and even how accurately you water.
The good news is that you do not have to choose between healthy plants and attractive containers. You simply need to make the beautiful pot work like a proper growing system.
The nursery pot is humble, but highly functional
That inexpensive plastic container does several important jobs well. It normally has drainage holes, a predictable shape, and enough flexibility to let you remove the root ball without damaging it. Its thin walls also make it easy to inspect roots, check moisture, and move the plant when light or weather changes.
Nursery containers are also commonly paired with a lightweight potting mix formulated to balance three essentials: drainage, air space, and water retention. Roots need moisture, but they also need oxygen. When the growing medium stays saturated for too long, roots become stressed and may stop functioning properly.
A decorative pot can provide those same benefits, but only if its design supports them.
The biggest problem: water has nowhere to go
The most common reason a plant struggles in an attractive pot is a missing or ineffective drainage hole. A container without an opening at the bottom can hold water around the root ball after every watering. The surface may look dry while the lower portion remains soggy.
That makes watering especially deceptive. You may see wilted leaves and assume the plant needs more water, when the roots are actually sitting in overly wet mix. Adding more water only deepens the problem.
How to check a decorative pot
- Look for one or more open drainage holes in the actual growing container.
- Make sure the holes are not sealed by glaze, a plastic plug, or a blocked saucer.
- Check that water can escape freely rather than collecting in a closed reservoir.
- After watering, empty any water that remains in the outer pot or saucer.
If you cannot drill the decorative pot, use it as a cachepot—a cover pot. Keep the plant in its original nursery container or move it into a simple plastic grower pot with drainage holes. Set that pot inside the decorative one, leaving enough space underneath for water to drain away from the root ball.
Why a layer of gravel does not solve the drainage problem
Many gardeners place gravel, broken pottery, or expanded clay in the bottom of a pot and expect it to improve drainage. In a container filled with a fine potting mix, that layer does not create a magical drainage reservoir. It can instead reduce the depth available for roots and leave the growing medium wetter above the transition between materials.
Use drainage holes, an appropriate potting mix, and a container of suitable size instead. If you need to protect a hole from clogging, a small piece of plastic mesh or screen works more directly than a thick layer of stones.
Beautiful materials change the watering schedule
Pot material influences how quickly moisture leaves the container. Unglazed terracotta is porous, so its walls can lose moisture to the surrounding air. This can be helpful for plants that dislike staying wet, but it can also make a thirsty plant dry out quickly—especially in a sunny window, on a hot patio, or in a windy location.
Plastic, resin, glazed ceramic, and metal generally lose less water through their sides. They may keep the mix moist for longer, but that is not automatically better. A moisture-loving fern and a drought-tolerant succulent need very different conditions, and both can fail when the pot material works against their natural preferences.
Dark-colored pots can also heat up in direct sun. A small container placed against a south- or west-facing wall may become much hotter than the surrounding air. Light-colored or shaded containers often provide a gentler environment during hot weather.
Match the pot to the plant
- Succulents and many Mediterranean herbs: consider porous terracotta and a very free-draining mix.
- Ferns and moisture-loving tropical plants: choose a pot that slows drying, while still providing drainage.
- Vegetables and flowering annuals: prioritize adequate volume, reliable drainage, and a material that will not overheat in the chosen location.
- Small houseplants: use a cachepot if you want a decorative look without sacrificing easy moisture control.
The wrong size can be just as troublesome
A large decorative planter may look generous, but “more room” is not always an advantage. If you place a small root ball into a much larger container, the unused potting mix can stay wet for a long time after watering. The plant may not have enough roots to use the available moisture.
For many houseplants, moving up only one container size is a sensible approach. Choose a new pot about 1 to 2 inches wider than the current root ball, rather than jumping from a small nursery pot into an oversized floor planter.
Large containers do have useful advantages. They dry out more slowly, provide better stability for tall plants, and offer more room for vegetables or long-term plantings. The key is to pair the container volume with a plant that can eventually use it.
Shape matters too
Shallow bowls dry quickly and provide limited root depth. Tall, narrow planters can tip in wind, particularly when filled with a top-heavy plant. Urn-shaped pots may be difficult to empty or repot because the root ball can become trapped below a narrow opening.
Before planting, imagine the future maintenance. Can you lift the plant out? Can you reach the soil surface? Will the container remain stable after a rainstorm or when the plant becomes larger?
A beautiful pot can hide root problems
Nursery containers make it relatively easy to notice roots circling around the inside. In a decorative planter, the root system may remain hidden for months. By the time you see declining growth, the plant may be severely root-bound.
Check for roots emerging from drainage holes, a root ball that dries out unusually fast, or growth that has slowed despite reasonable light and feeding. When you repot, gently loosen densely matted roots. If roots circle tightly around the outside, make a few shallow vertical cuts or tease them outward with your fingers.
Do not automatically disturb every root system. Some plants dislike excessive handling, and a lightly rooted plant may need only fresh mix and a slightly larger container. Aim to encourage outward growth without tearing the entire root ball apart.
Use the right potting mix
Garden soil is usually a poor choice for containers. In a pot, it can become heavy and compacted, reducing air movement and slowing drainage. Instead, choose a quality commercial potting mix labeled for containers.
For a typical houseplant or mixed annual planting, an all-purpose potting mix may be suitable. Cacti, succulents, orchids, and some specialty plants need mixes with different proportions of bark, perlite, sand, or other materials. Follow the needs of the plant rather than trying to make one mix serve everything.
When filling the pot, avoid packing the mix tightly. Leave about an inch of space below the rim so water can soak in without spilling over. After planting, water thoroughly until some water exits the drainage holes; this helps settle the mix around the roots and reveals whether drainage is working.
A simple watering experiment you can try
If you are unsure whether a decorative pot is causing trouble, run a small comparison test. Use two similar plants or two sections of the same plant. Place one in a standard nursery pot and the other in the decorative container, keeping light, temperature, plant size, and potting mix as similar as possible.
For one week, measure the water you give each plant and record the weight or moisture of the pot before and after watering. As an example, a 6-inch plant in a porous terracotta pot might need 12 fluid ounces of water every three days in a warm, bright room, while the same-sized plant in a glazed cachepot may still be damp after 12 ounces.
Those numbers are not a universal schedule. They are an illustration of why measuring your own conditions is more useful than following a calendar. Your home, season, plant variety, potting mix, and sunlight will all change the result.
What to record
- Date and amount of water added.
- Whether water drained from the bottom.
- How many days passed before the top inch of mix felt dry.
- Leaf firmness, color, and new growth.
- Whether water collected inside the decorative outer pot.
After several waterings, patterns become easier to see. If the decorative pot retains water much longer, reduce the amount or frequency of watering only after checking the moisture below the surface. If the plant dries rapidly, move it away from harsh afternoon sun, use a less porous pot, or choose a larger container when appropriate.
Different plant varieties may react differently
Even within one plant type, varieties can behave differently in containers. Compact or dwarf cultivars often need less root space than vigorous forms. A small determinate tomato may perform better in a patio container than an indeterminate variety that keeps producing long vines.
Among houseplants, one pothos or philodendron may tolerate a missed watering while another grows faster and becomes thirsty sooner. Leaf size, growth rate, root density, and exposure to light all affect water use.
When comparing varieties, look for labels such as “compact,” “dwarf,” “patio,” “bush,” or “determinate,” but treat those terms as helpful clues rather than guarantees. Give every plant a suitable container and observe how it responds.
How to make the stylish pot plant-friendly
- Start with drainage. Use a pot with open holes, or keep the plant in a draining grower pot inside the decorative container.
- Choose a suitable size. Move up gradually unless the plant is a vigorous, long-term specimen that genuinely needs more volume.
- Use container mix. Avoid filling pots with heavy yard soil.
- Match material to moisture needs. Porous terracotta dries faster; glazed and plastic containers retain moisture longer.
- Protect roots from heat. Shade dark pots during intense summer sun and avoid placing them against heat-reflecting surfaces.
- Check the root ball. Repot when roots circle tightly, emerge from holes, or the plant dries out unusually quickly.
- Measure before guessing. Record watering for a week or two and adjust based on the plant’s response.
The best container is the one that quietly does its job
A nursery pot is not unattractive because it is cheap; it is useful because it solves practical growing problems. A decorative planter can do the same, but it needs drainage, suitable volume, the right potting mix, and a watering routine that fits its material and location.
So keep the beautiful pot. Just think of it as part of a small ecosystem rather than a piece of decoration alone. With a draining inner pot, sensible sizing, and a few careful observations, your plants can enjoy both healthy roots and a polished home.